本教程将带您一步步了解如何使用慧眼选鸟进行智能选片,即使您是电脑新手也能轻松上手。 This tutorial will guide you step by step through using SuperPicky for intelligent photo culling, even if you're new to computers.
5 分钟学会基本操作,让 AI 帮您选出最佳鸟照 Learn the basics in 5 minutes and let AI pick your best bird photos
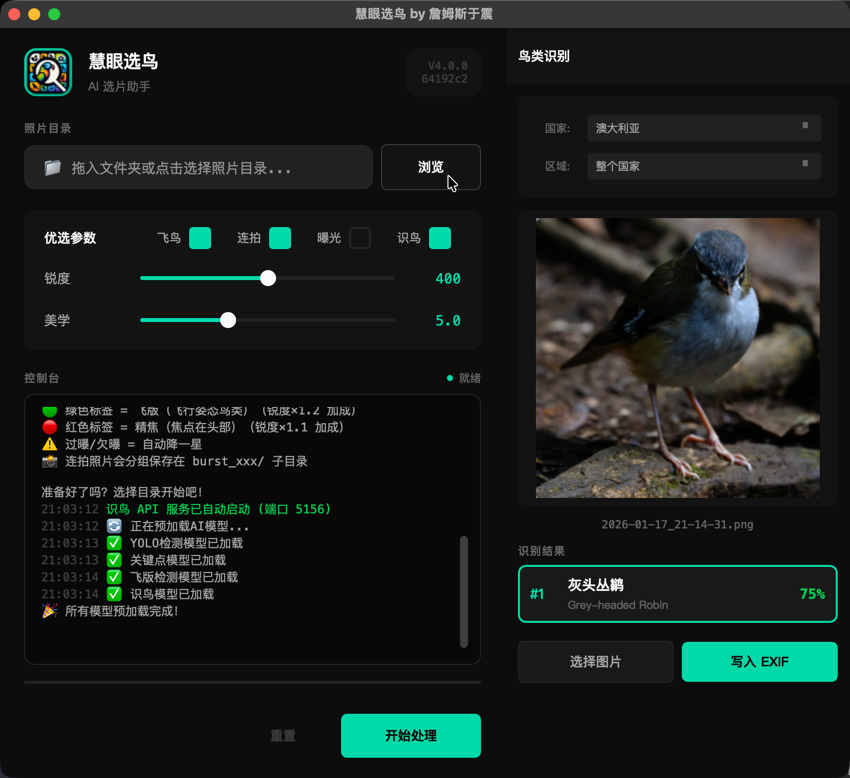
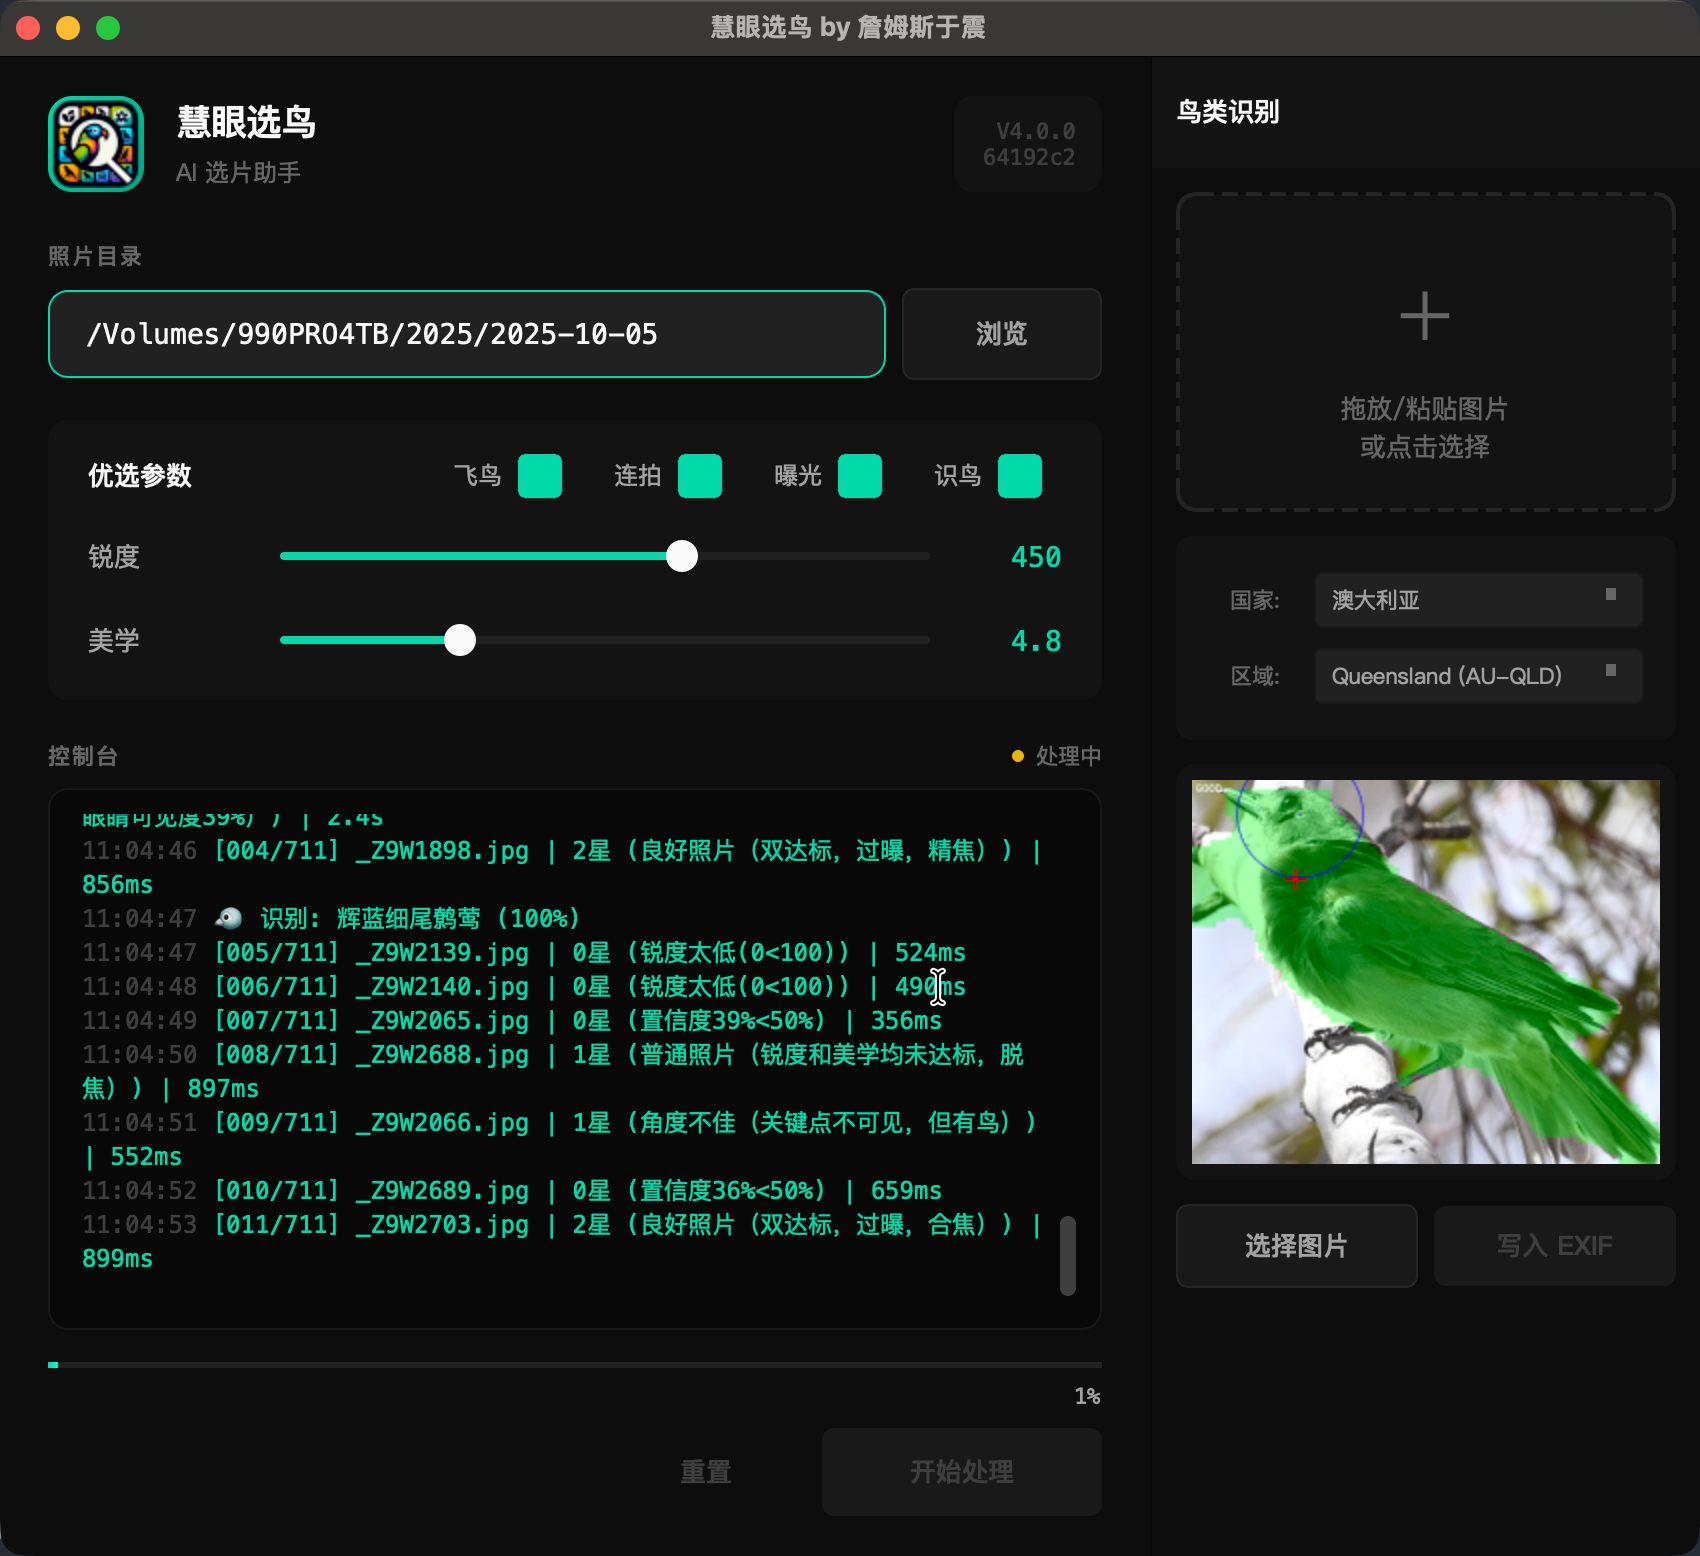
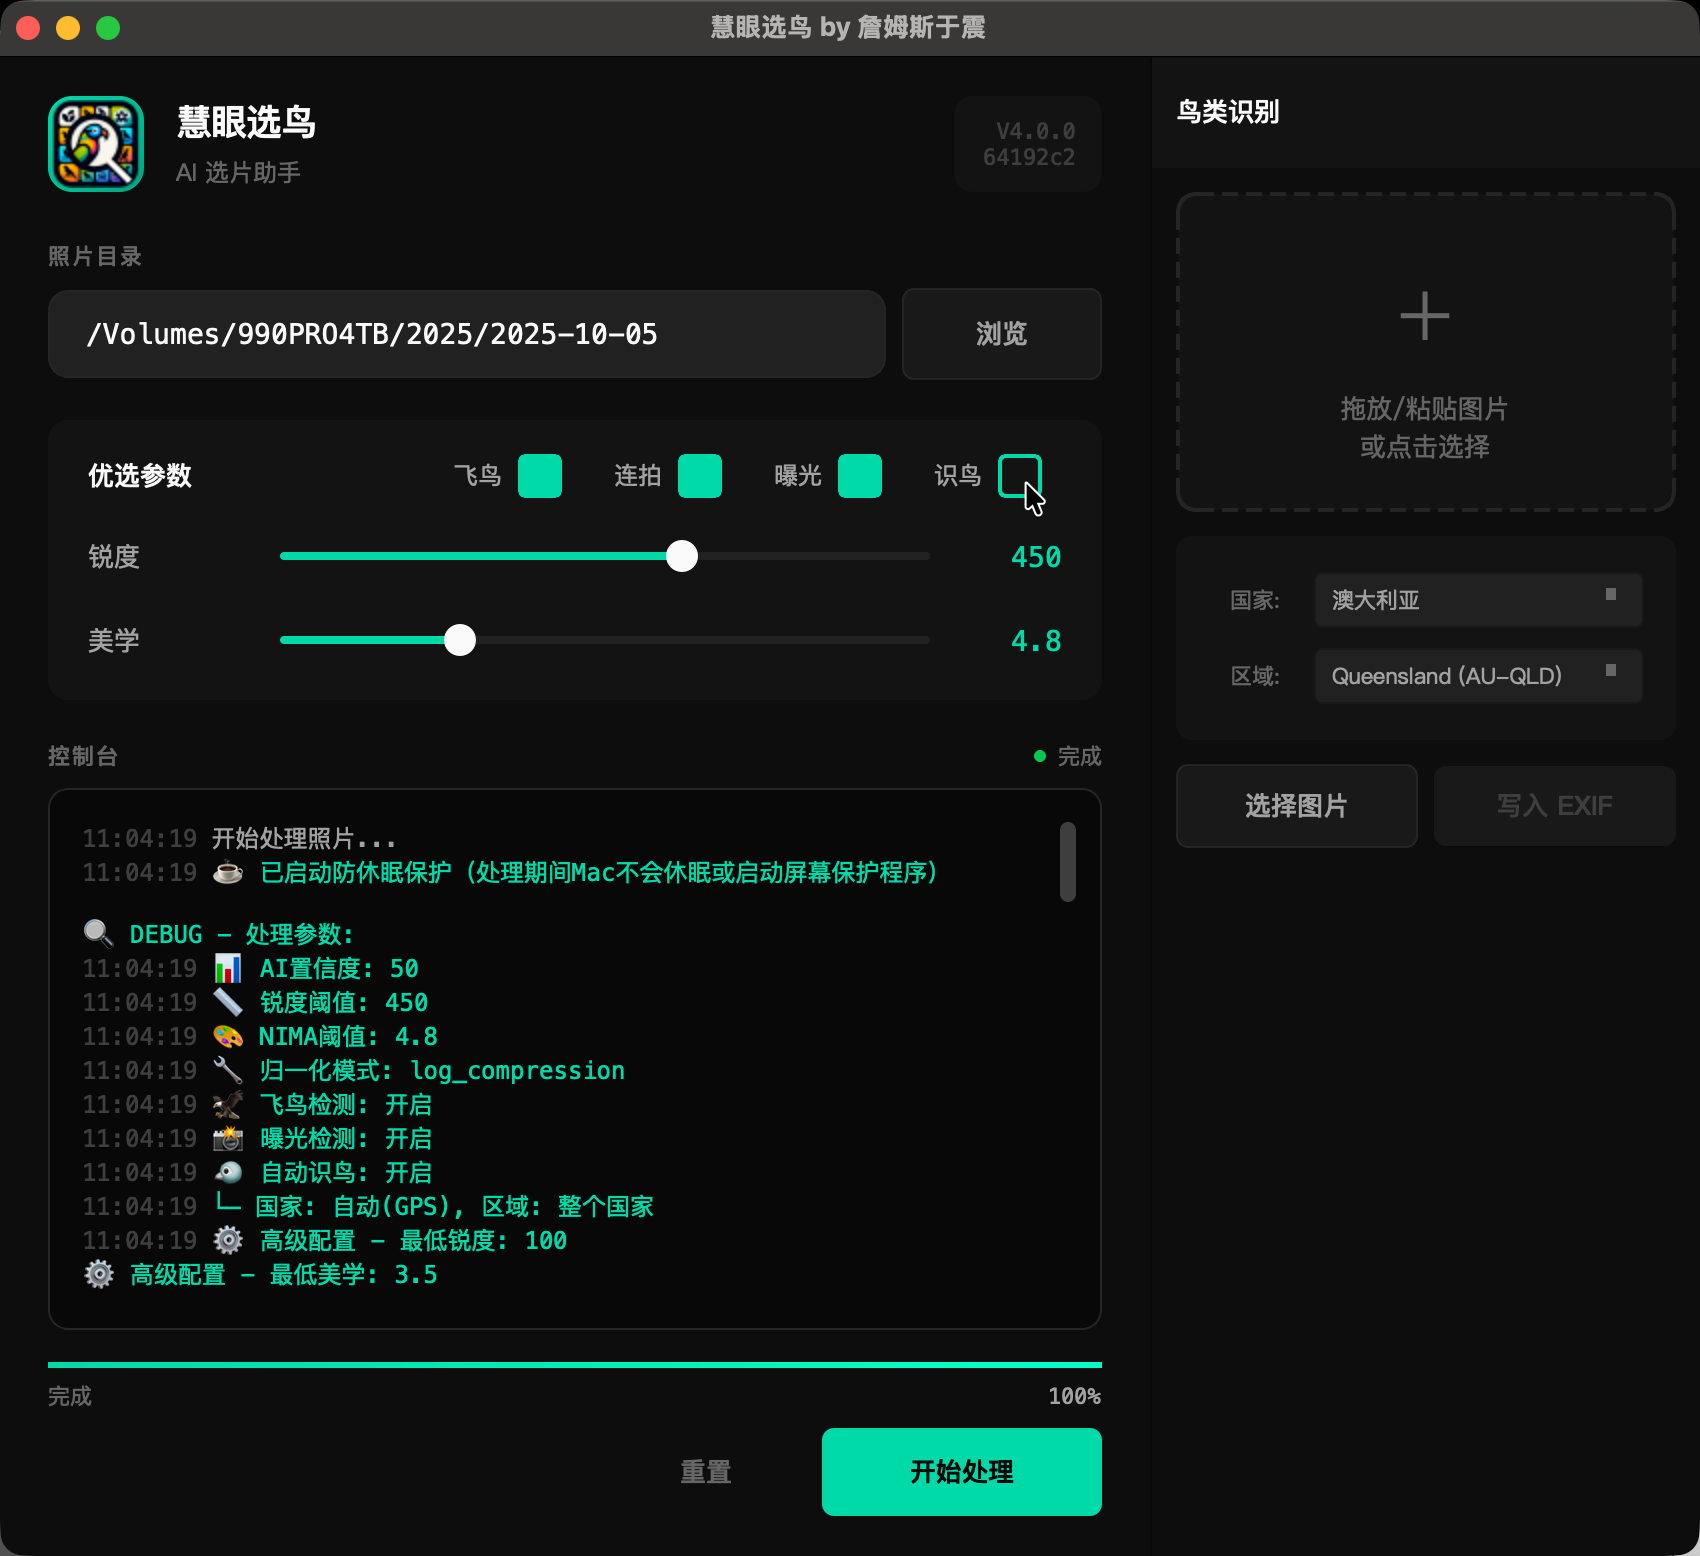
双击打开 SuperPicky 应用程序。您会看到如图所示的主界面,包含照片目录输入框、优选参数设置和控制台区域。 Double-click to open SuperPicky. You'll see the main interface as shown, including the photo directory input, selection parameters, and console area.
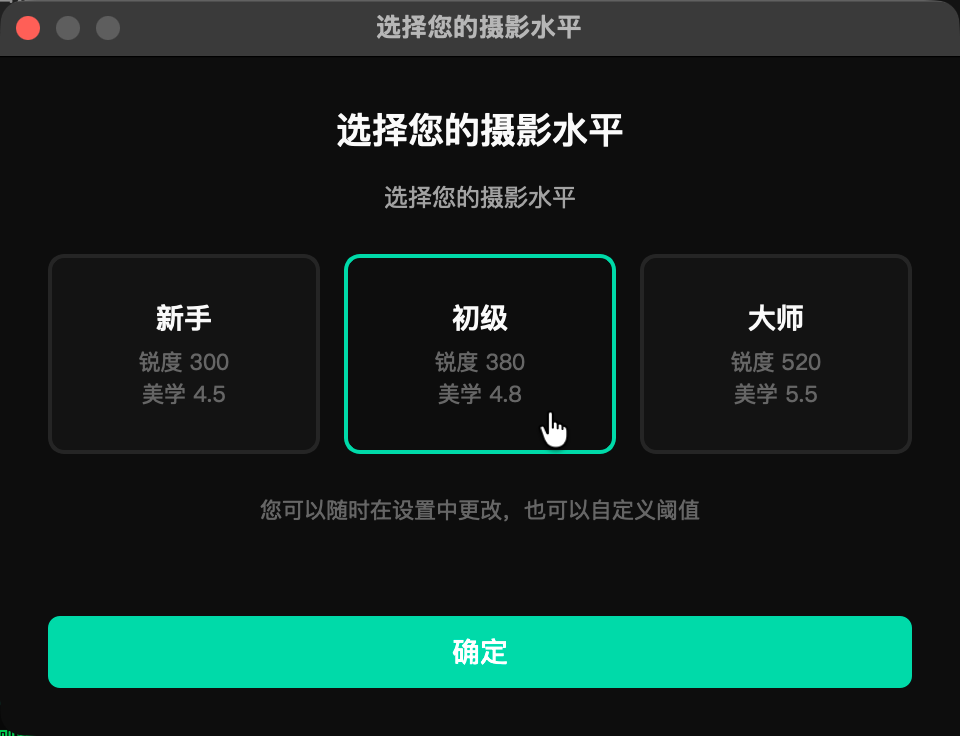
首次启动时,软件会弹出摄影水平选择对话框。根据您的拍鸟经验选择合适的水平,AI 会据此调整选片的严格程度: On first launch, a skill level dialog appears. Choose based on your bird photography experience - AI adjusts selection strictness accordingly:
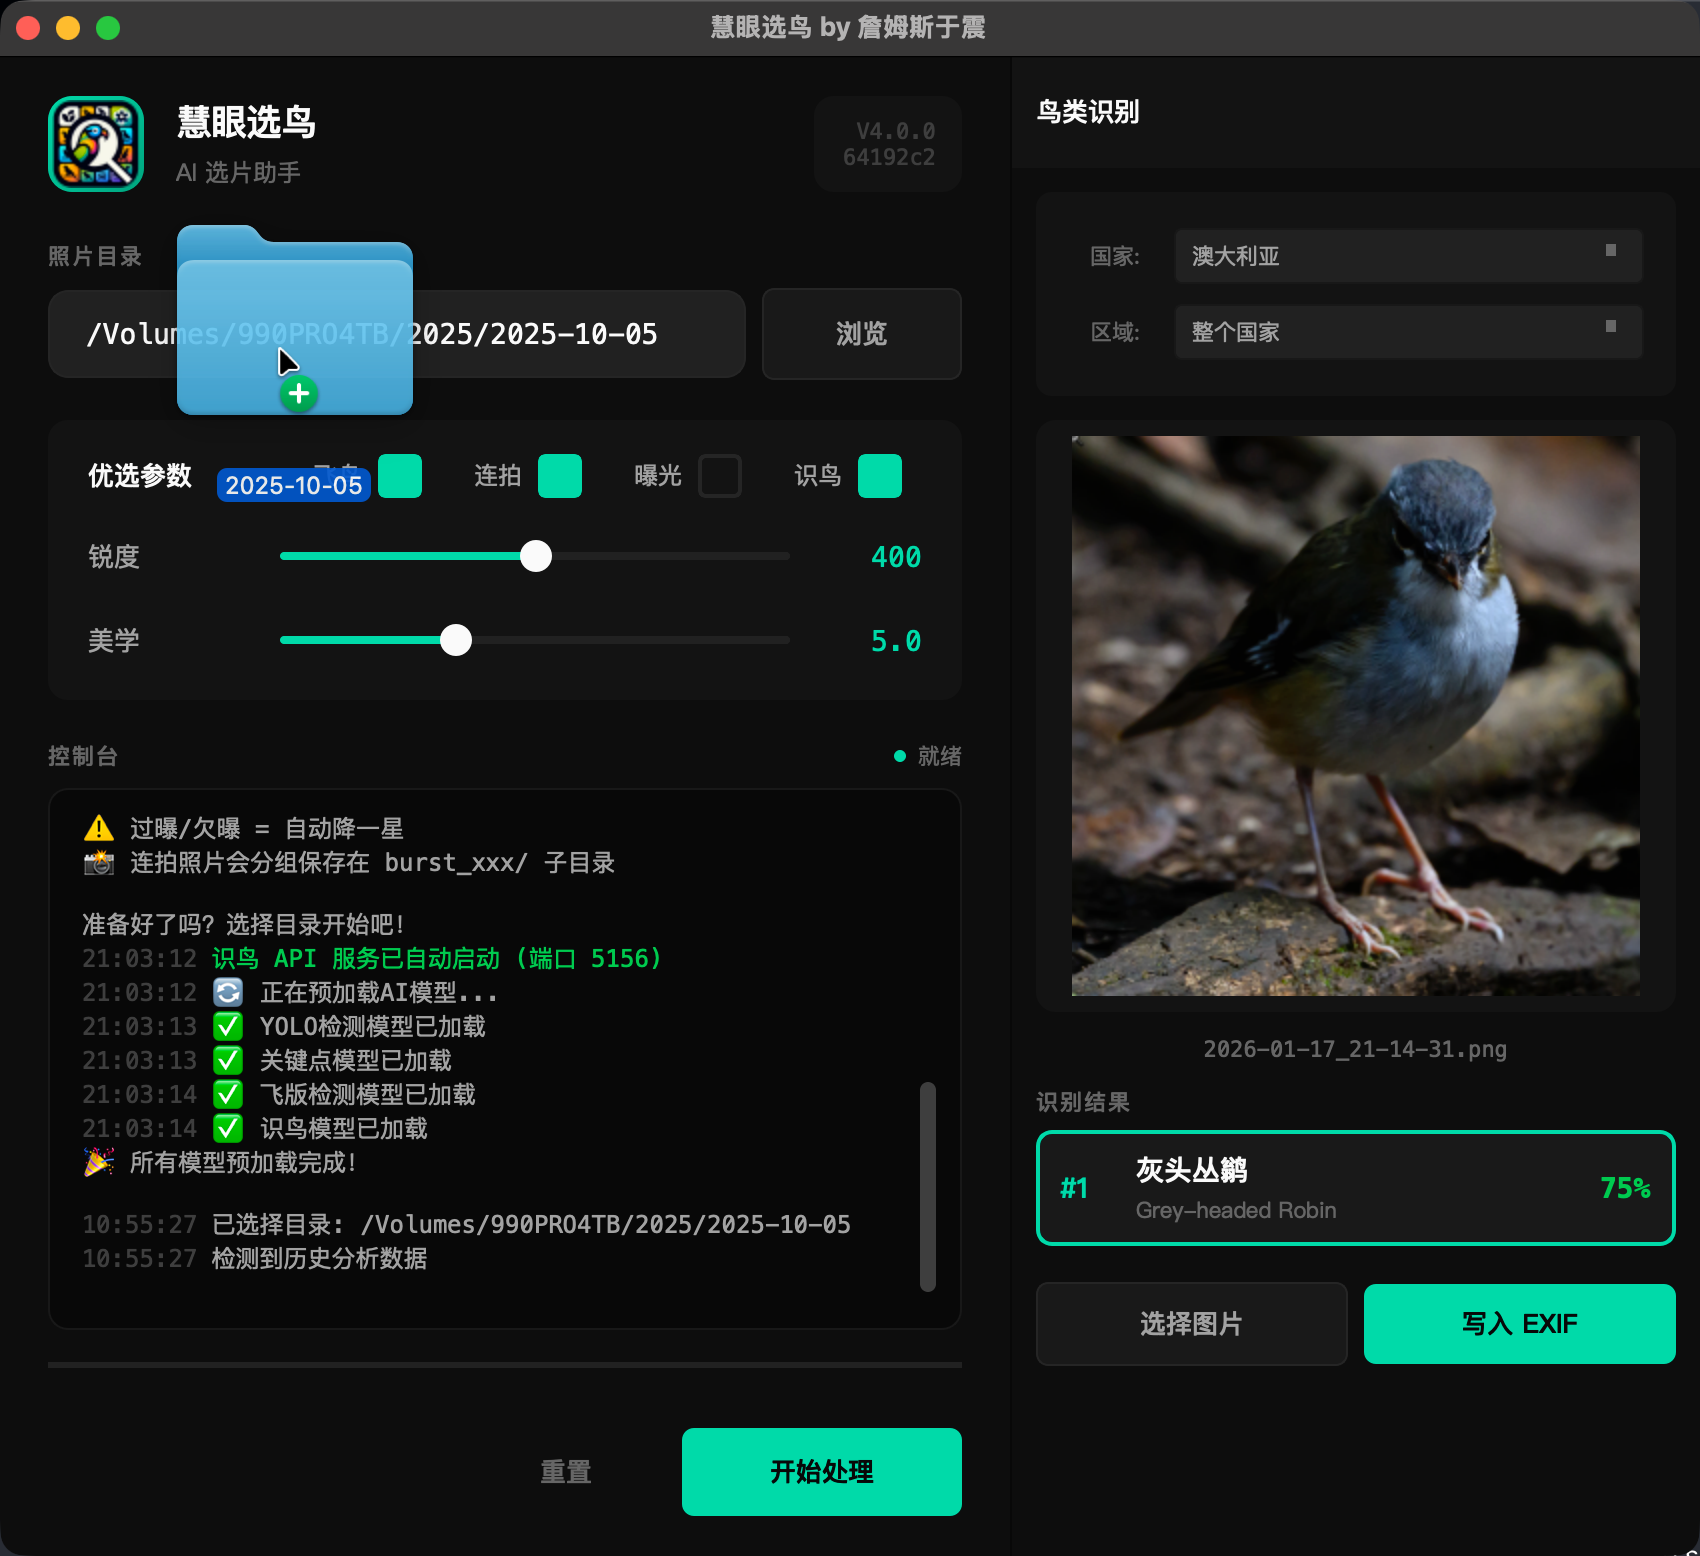
将您的照片文件夹直接拖入地址栏,或者点击右侧的「浏览」按钮手动选择。建议选择某一天的拍摄目录,例如
2025-10-05。
Drag your photo folder directly into the address bar, or click
"Browse" to select manually. We recommend selecting a single day's shooting folder, like
2025-10-05.
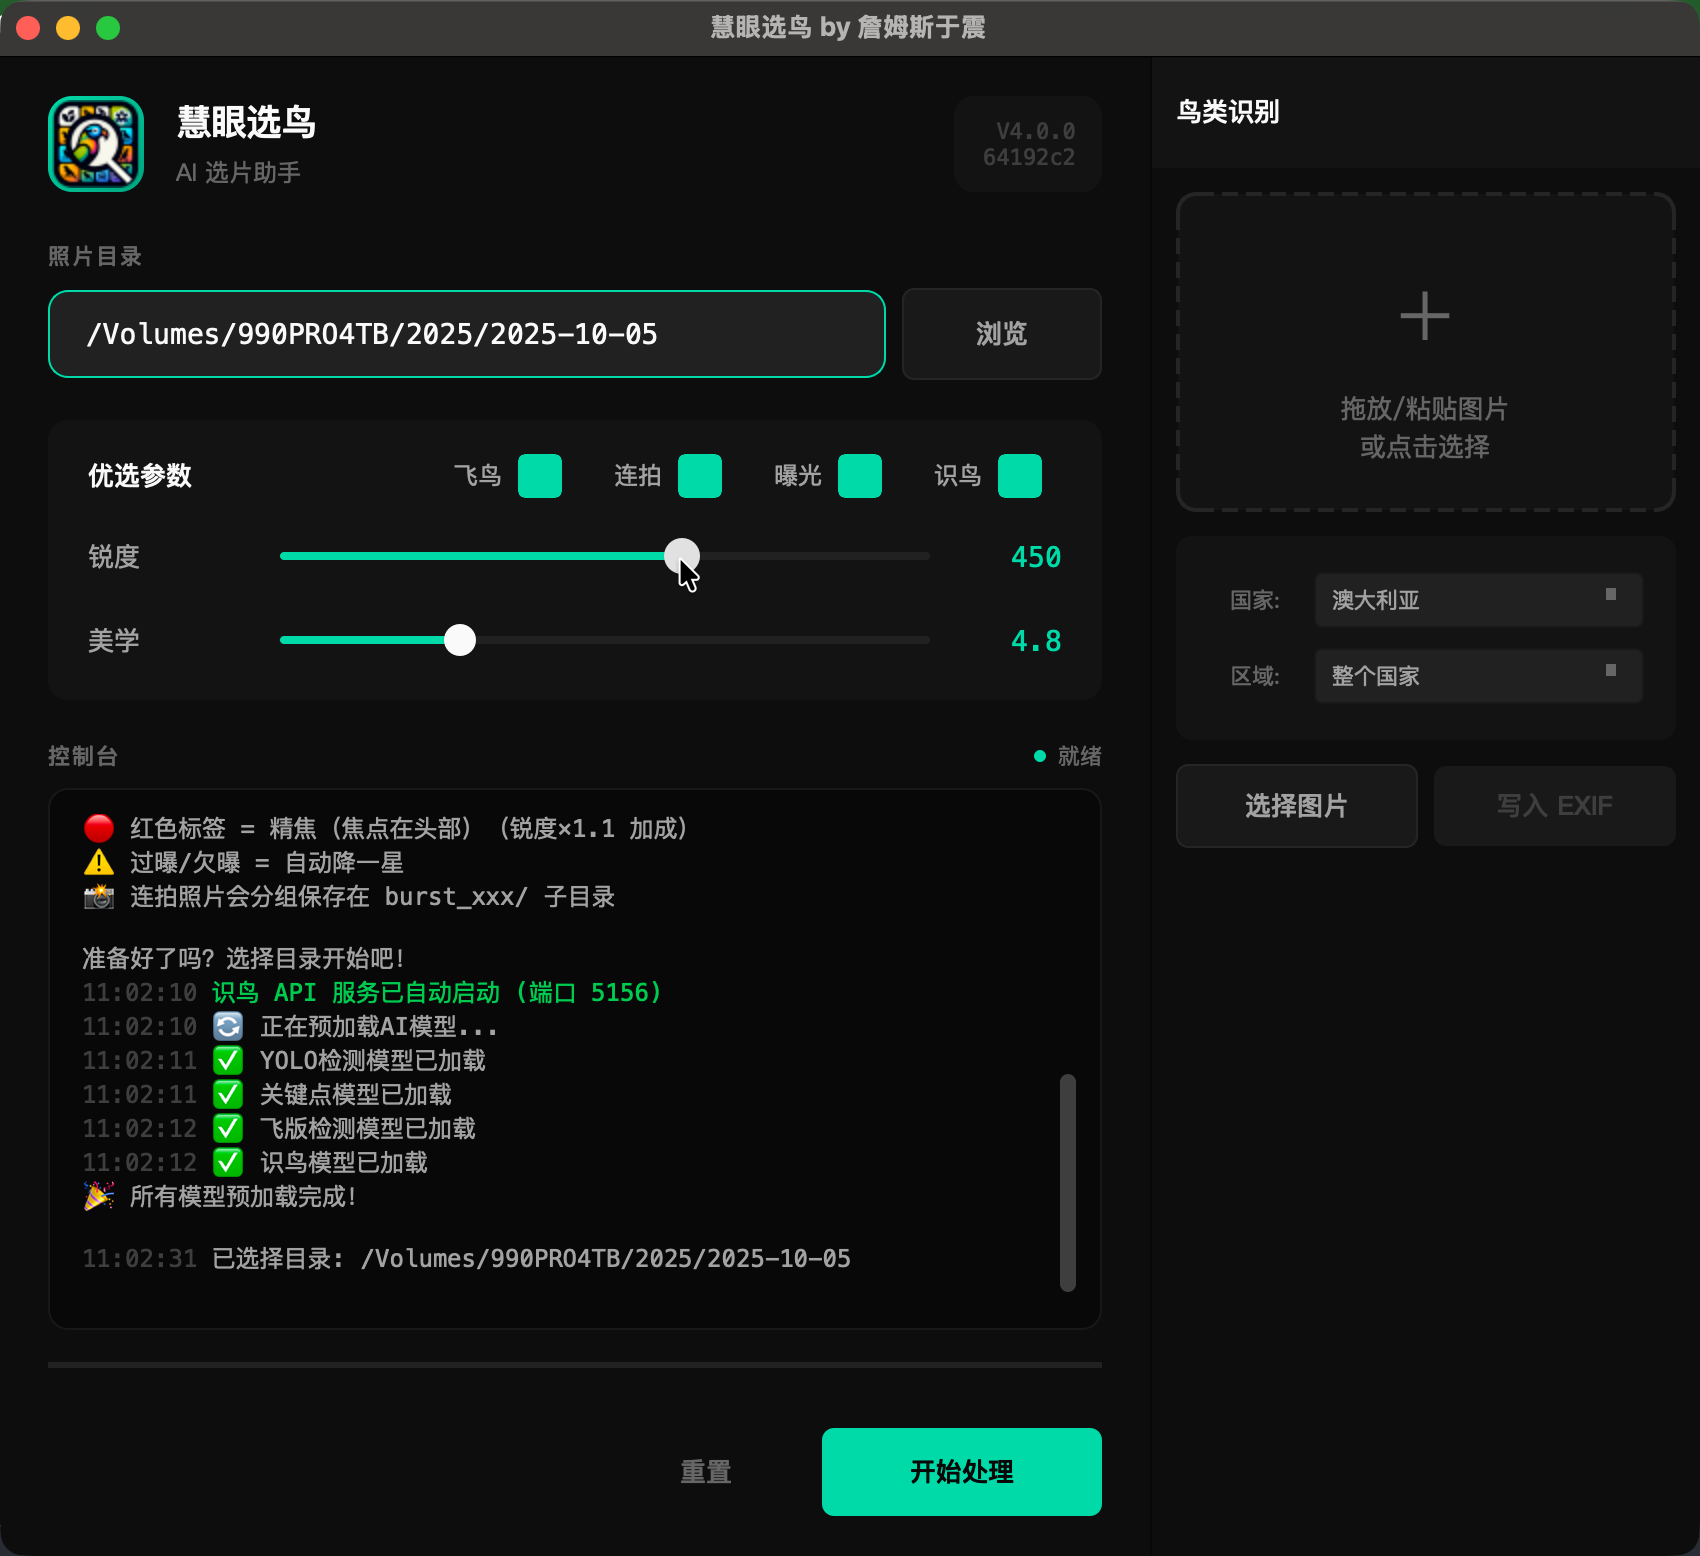
默认参数已经过优化,适合大多数情况。您可以根据需要调整: Default parameters are optimized for most cases. You can adjust as needed:
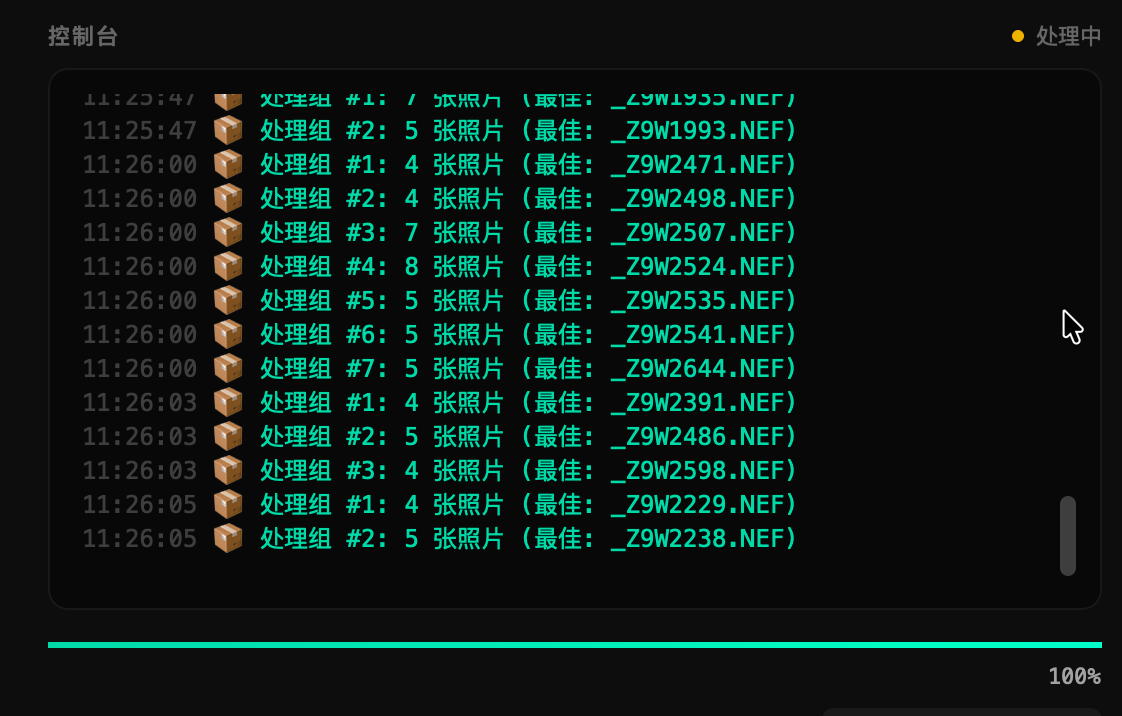
点击右下角的「开始处理」按钮。AI 将开始分析每一张照片,控制台会实时显示处理进度和每张照片的评分结果。 Click the "Start Culling" button at the bottom right. AI will analyze each photo, and the console shows real-time progress and rating results.
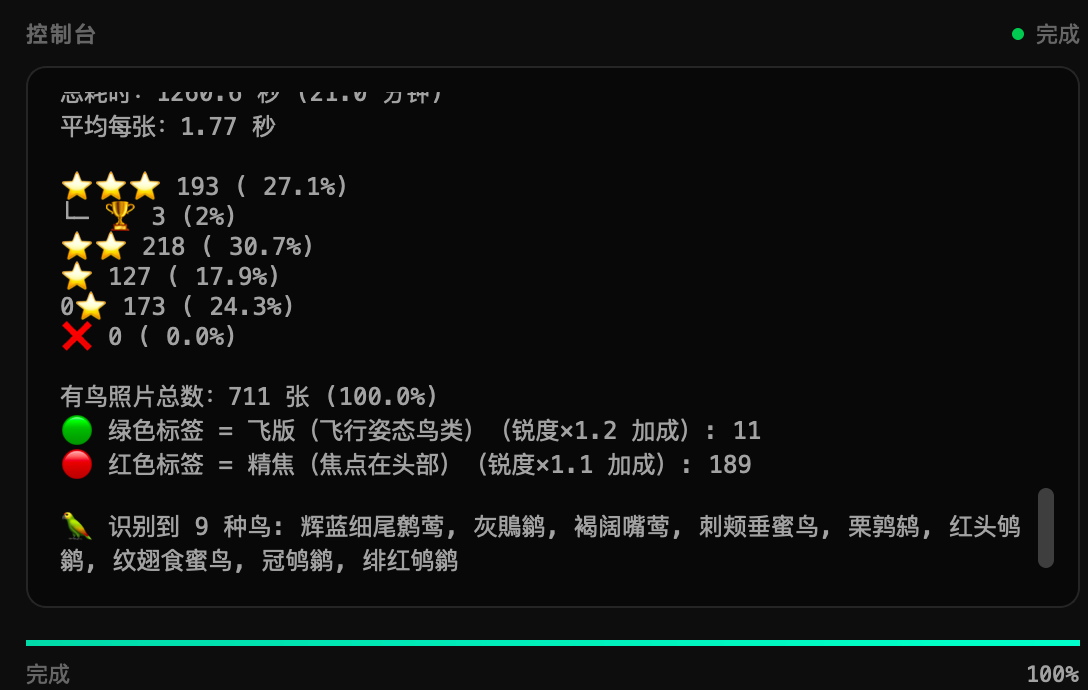
处理完成后,控制台会显示详细的统计结果: When processing completes, the console shows detailed statistics:
处理完成后会弹出确认对话框。点击「是」,照片将按星级自动分类到对应文件夹: A confirmation dialog appears after processing. Click "Yes" to auto-organize photos into rating folders:
3星_优选/2星_良好/1星_普通/0星_放弃/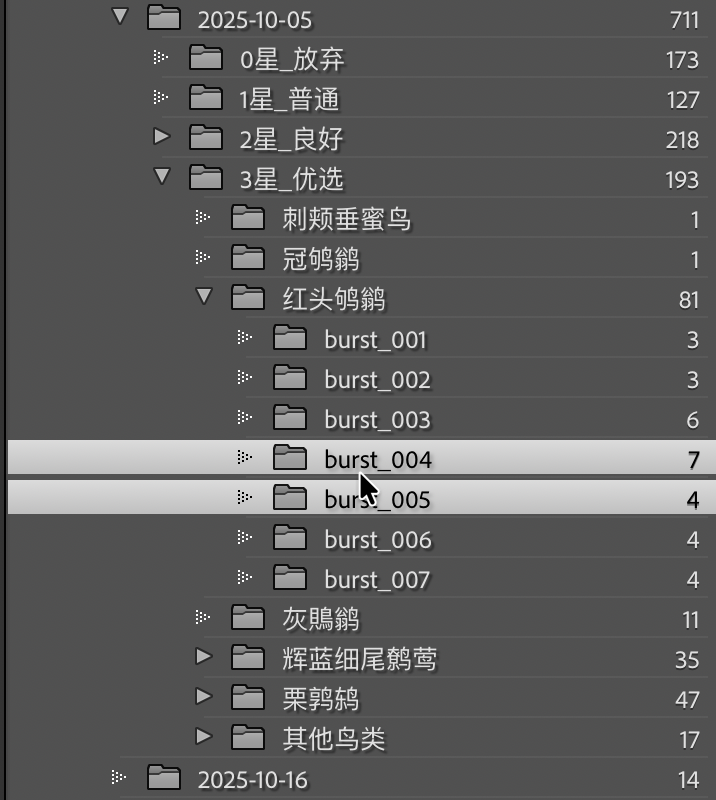
深入了解 AI 的评分逻辑和目录结构 Learn about AI scoring logic and folder structure
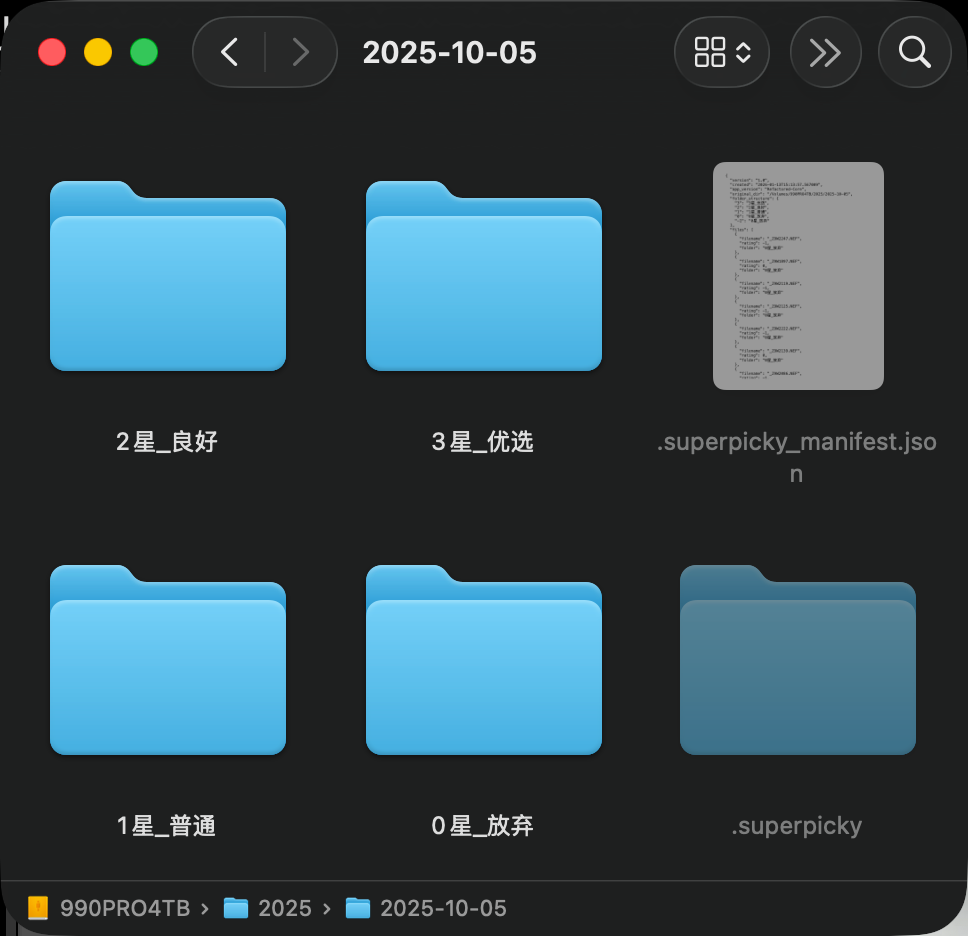
处理完成后,您的照片目录会变成这样的结构。注意 3星_优选 文件夹内还有
burst_xxx 子目录,这些是 AI 自动识别的连拍序列。
After processing, your photo directory will look like this. Note the
burst_xxx subdirectories inside 3星_优选 - these are AI-detected
burst sequences.
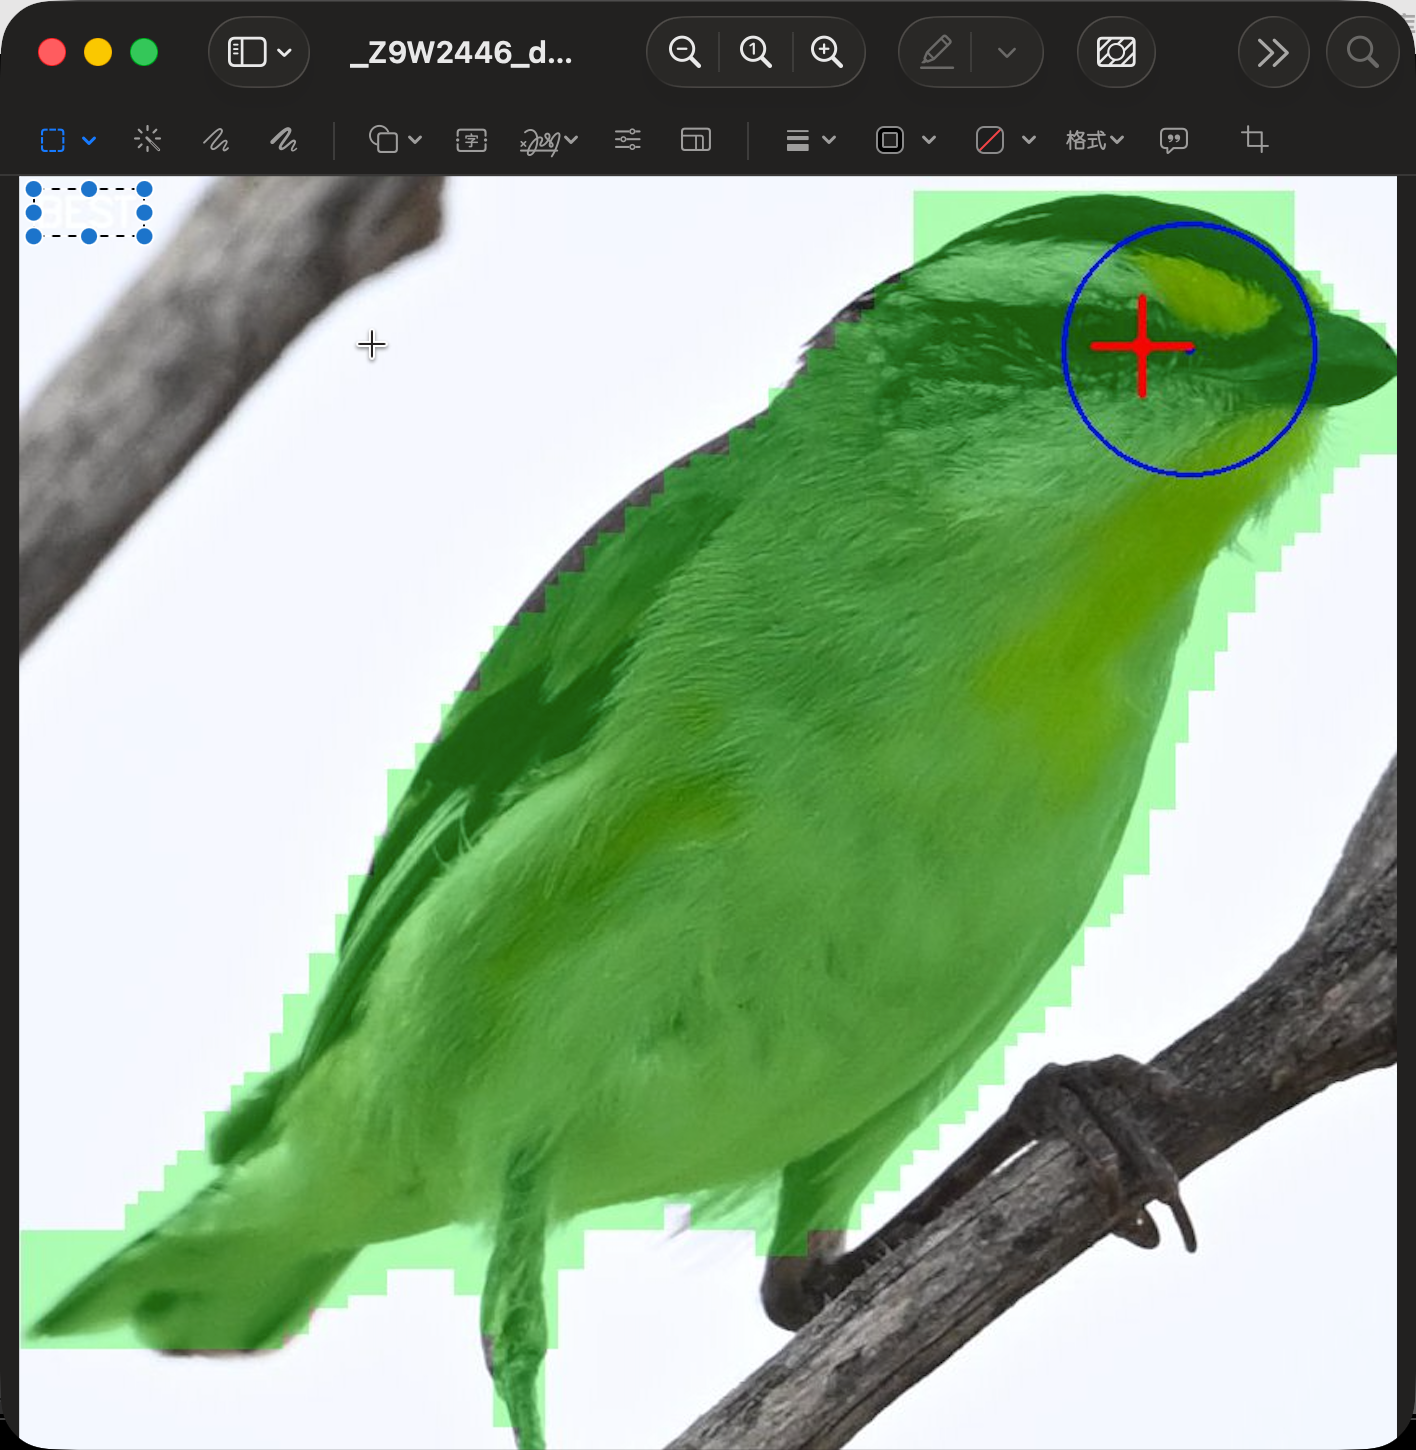
AI 会从 RAW 文件中读取相机的对焦点位置(红色十字),并检测鸟头区域(蓝色圆圈)。如果对焦点落在鸟头区域内,就判定为「精焦」,照片会获得锐度加成。 AI reads the camera's focus point (red cross) from the RAW file and detects the bird's head area (blue circle). If the focus point falls within the head it's rated as "Critical Focus" and gets a sharpness bonus.
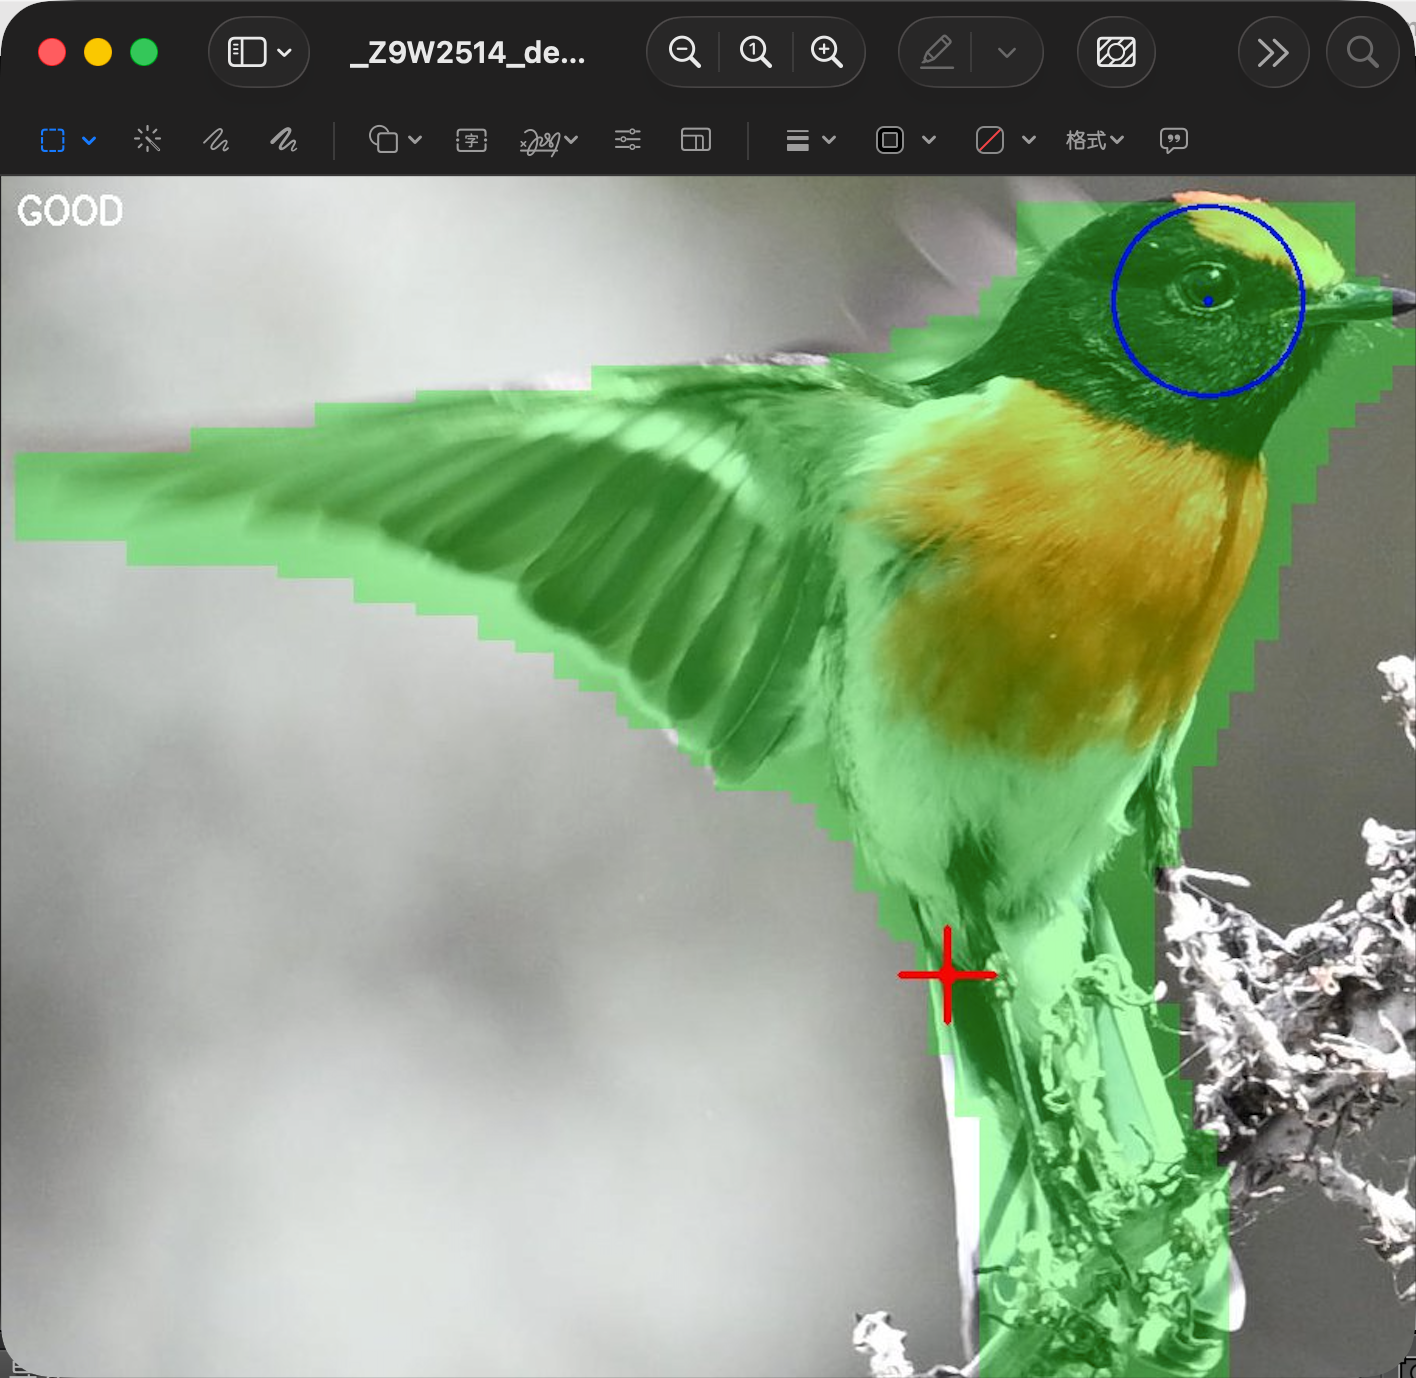
如果对焦点落在鸟的身体上(绿色区域内),但不在头部区域,就判定为「合焦」。这类照片仍然是对焦正确的,只是不在最佳位置。 If the focus point falls on the bird's body (green area) but not on the head, it's rated as "Good Focus". These photos are still correctly focused, just not at the optimal position.
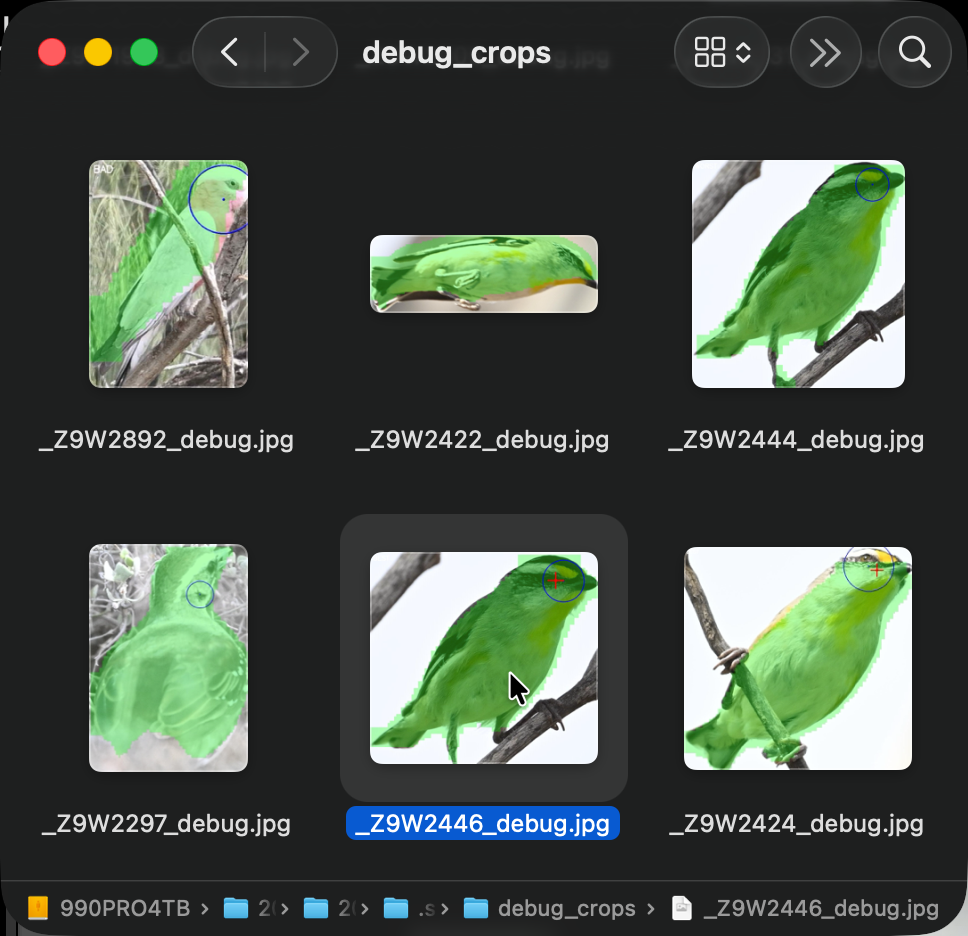
如果您想深入了解 AI 的分析过程,可以在 Finder 中按
Cmd+Shift+. 显示隐藏文件,然后打开
.superpicky/debug_crops/ 目录。
To understand AI's analysis process, press
Cmd+Shift+. in Finder to show hidden files, then open
.superpicky/debug_crops/ directory.
这里保存了每张照片的分析结果图,显示鸟的分割掩码(绿色)、头部区域(蓝色圆圈)和对焦点(红色十字)。 This contains analysis images for each photo, showing bird segmentation mask (green), head area (blue circle) and focus point (red cross).
将选片结果导入 Lightroom,高效完成后期流程 Import results to Lightroom for efficient post-processing
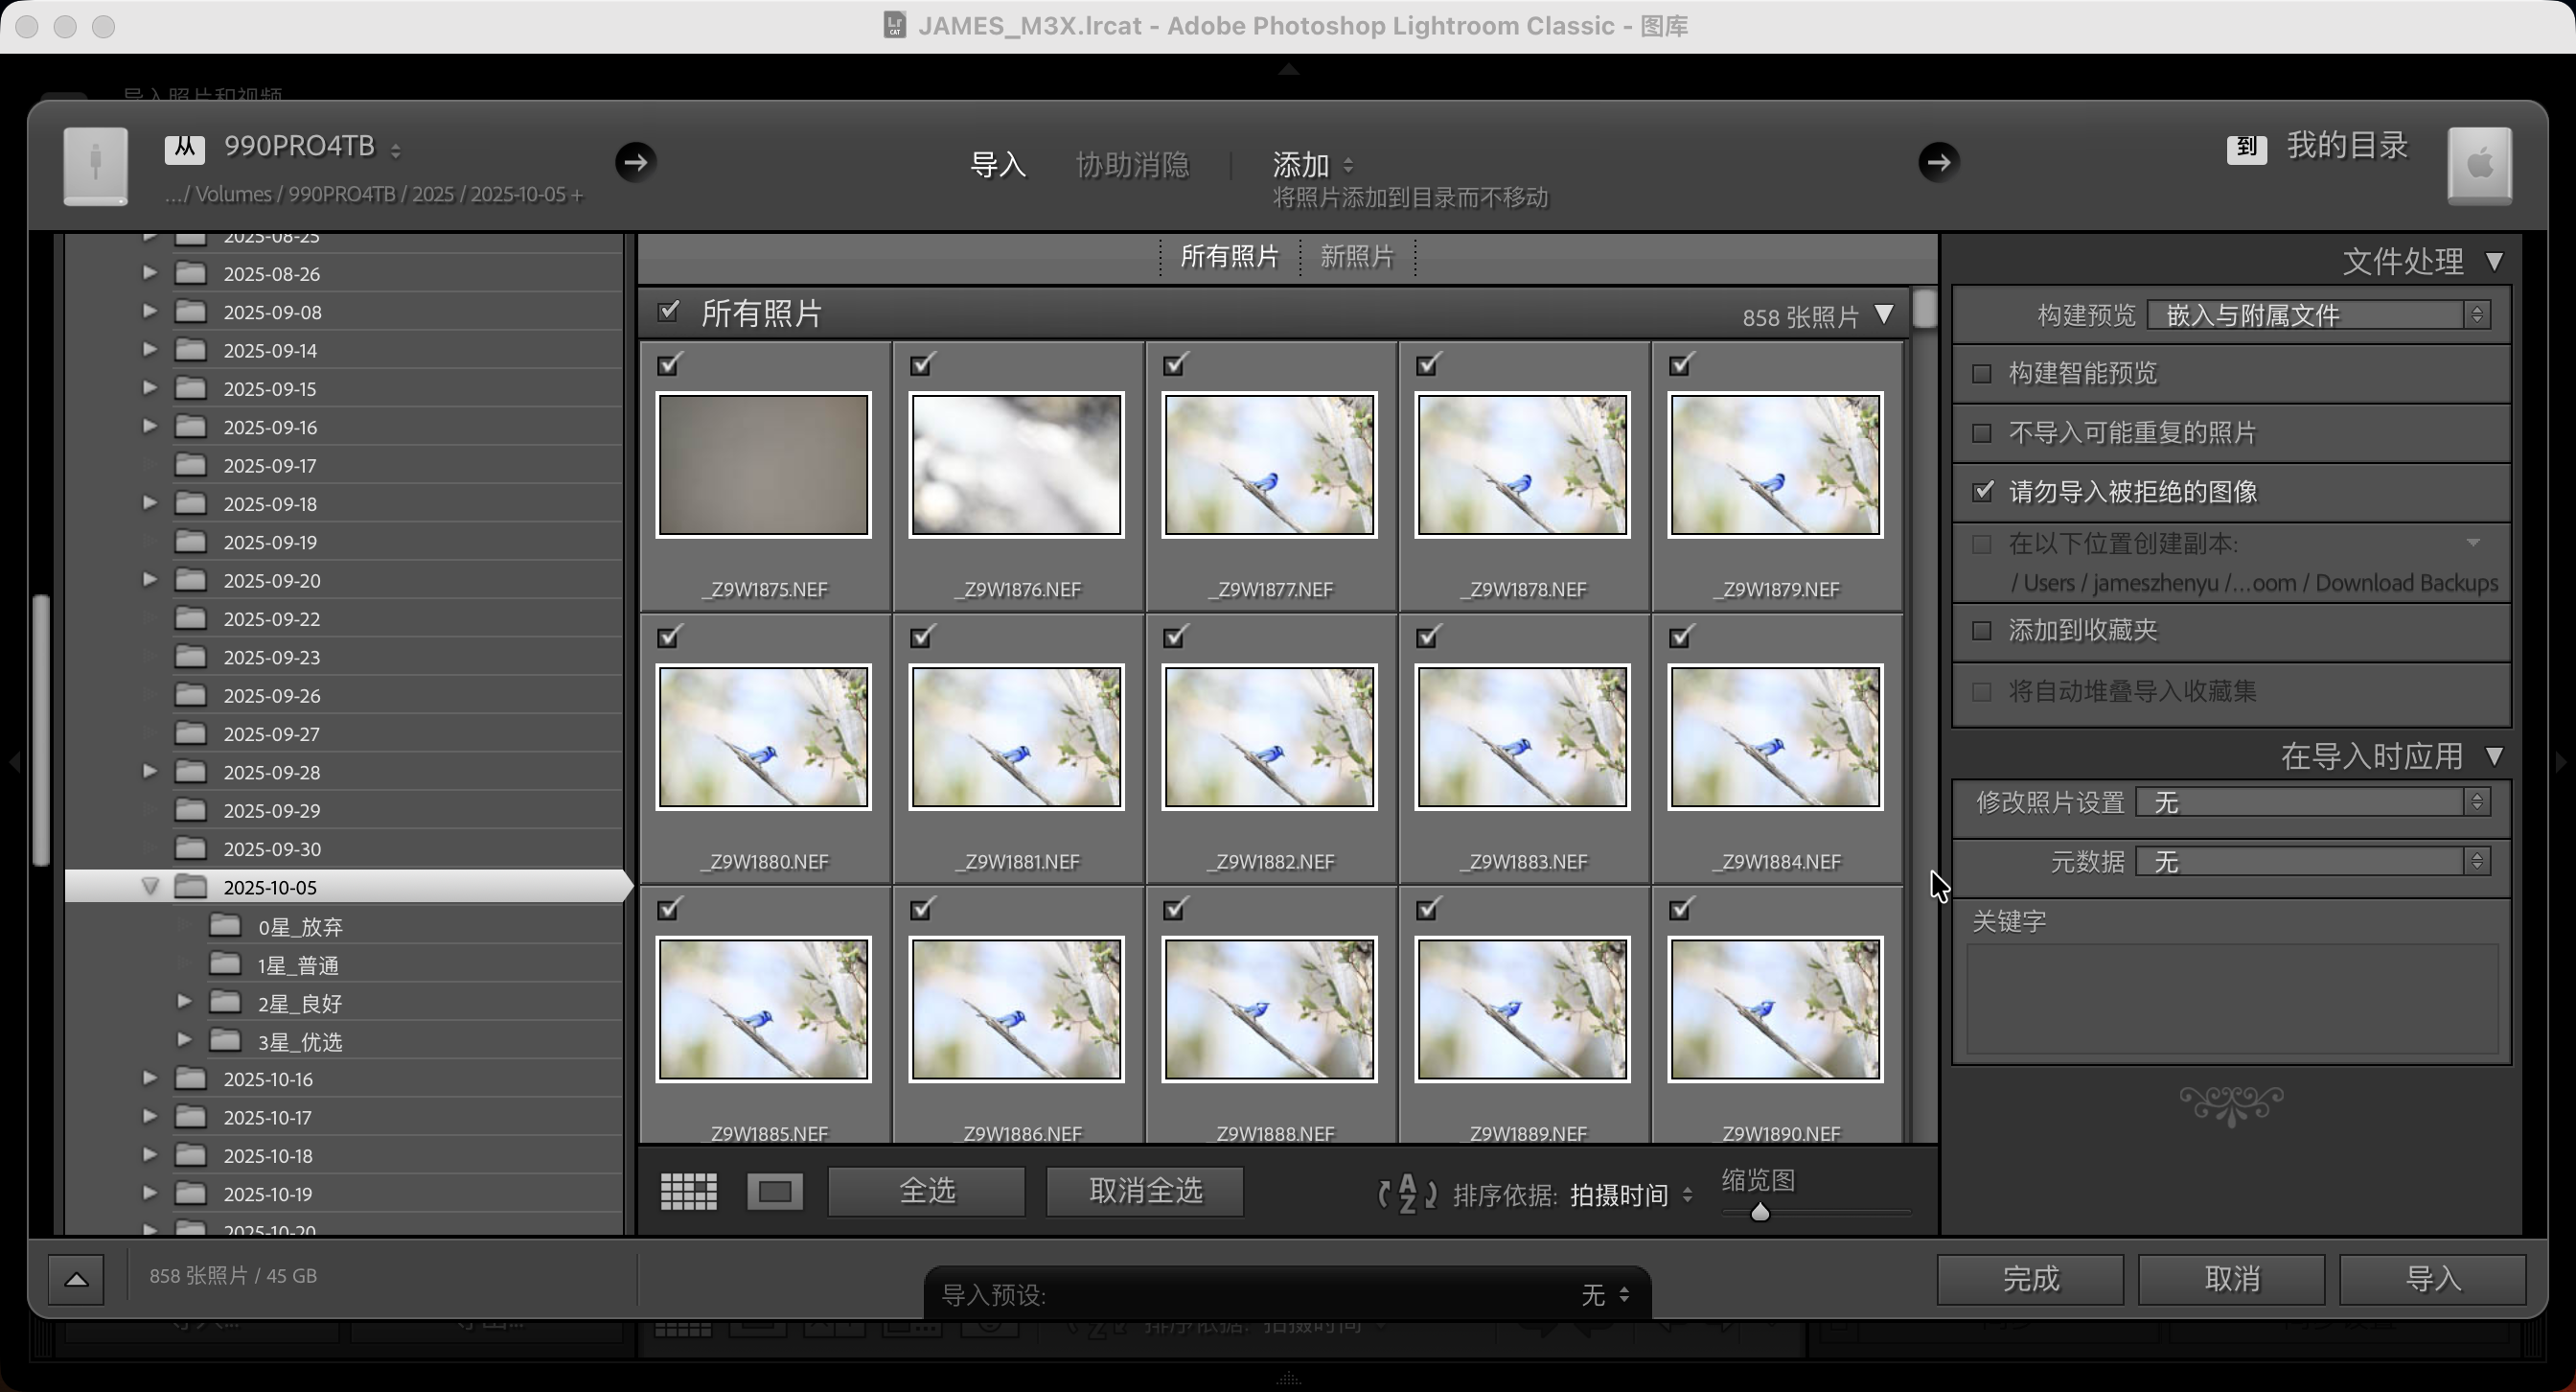
打开 Lightroom Classic,选择「添加」方式导入照片。这样可以保留原有的目录结构和星级文件夹。 Open Lightroom Classic and select "Add" import method. This preserves the original folder structure and star-rating folders.
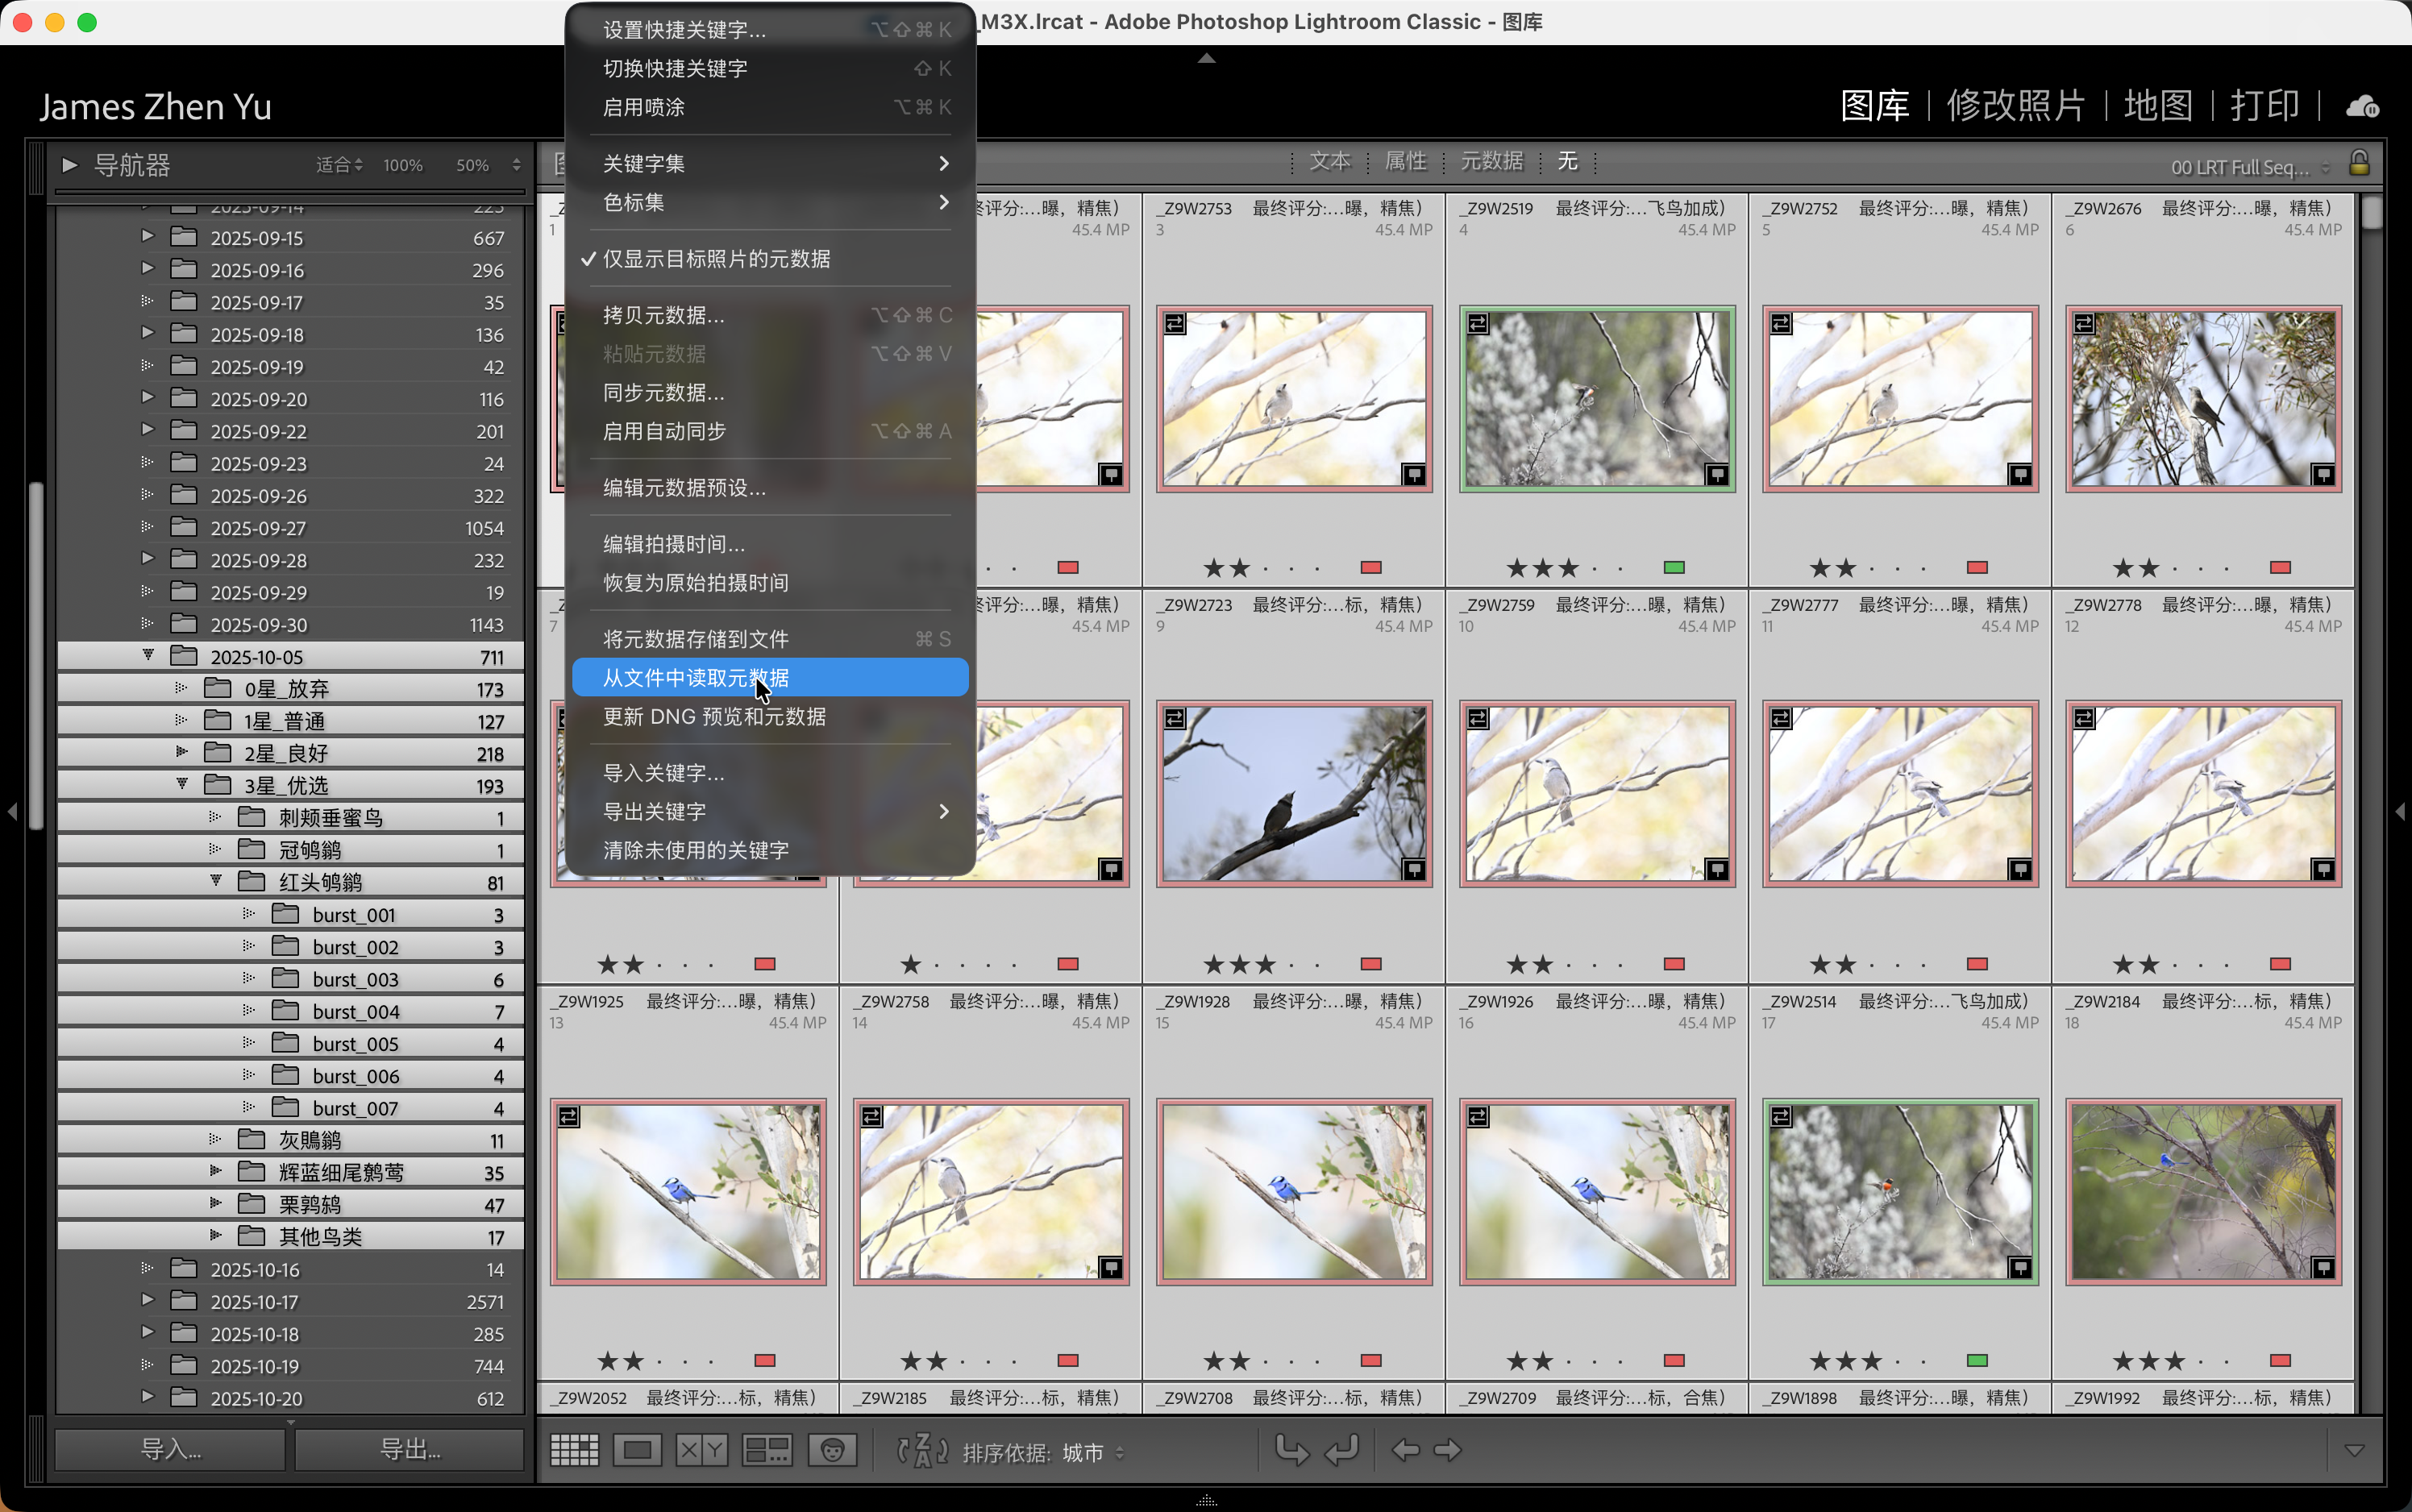
导入后,选中所有照片(Cmd+A),然后选择菜单「元数据」→「从文件读取元数据」。这会同步 SuperPicky 写入的评分、旗标和颜色标签。 After import, select all photos (Cmd+A), then go to "Metadata" → "Read Metadata from Files". This syncs ratings, flags and color labels written by SuperPicky.
在右侧「元数据」面板中,展开「题注」字段可以看到 AI 的详细分析结果: In the right "Metadata" panel, expand "Caption" field to see detailed AI analysis:
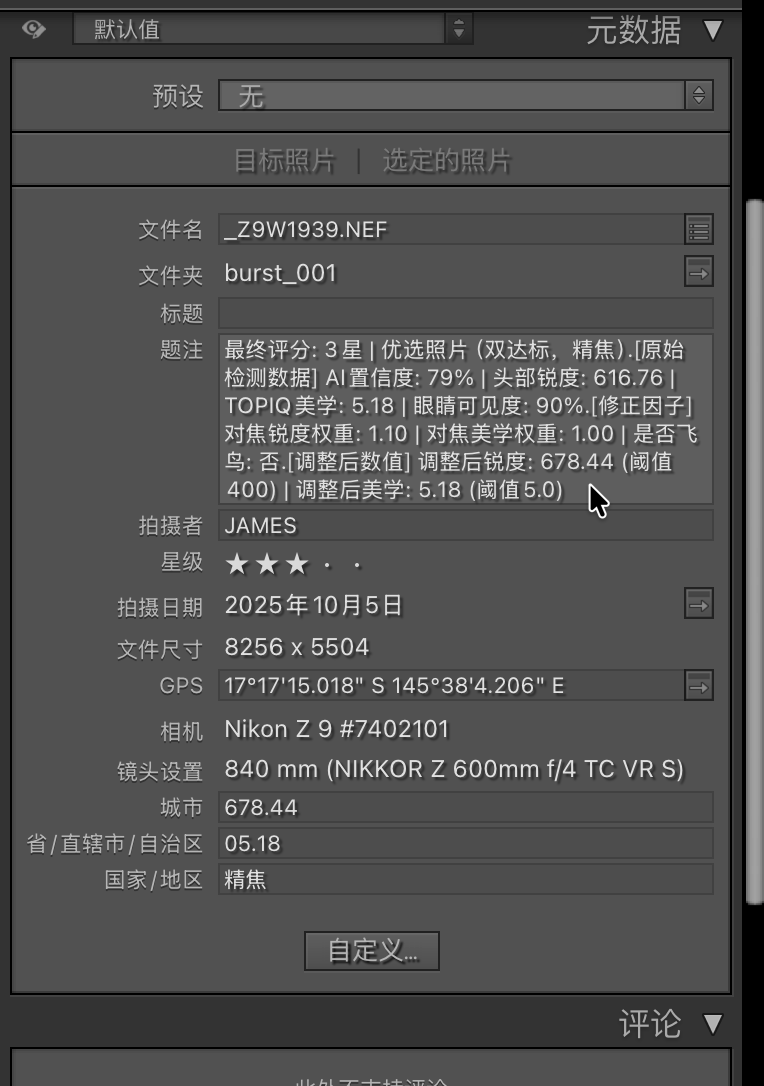
SuperPicky 将锐度和美学评分写入了特殊字段,您可以直接按这些字段排序: SuperPicky writes sharpness and aesthetics scores to special fields for easy sorting:
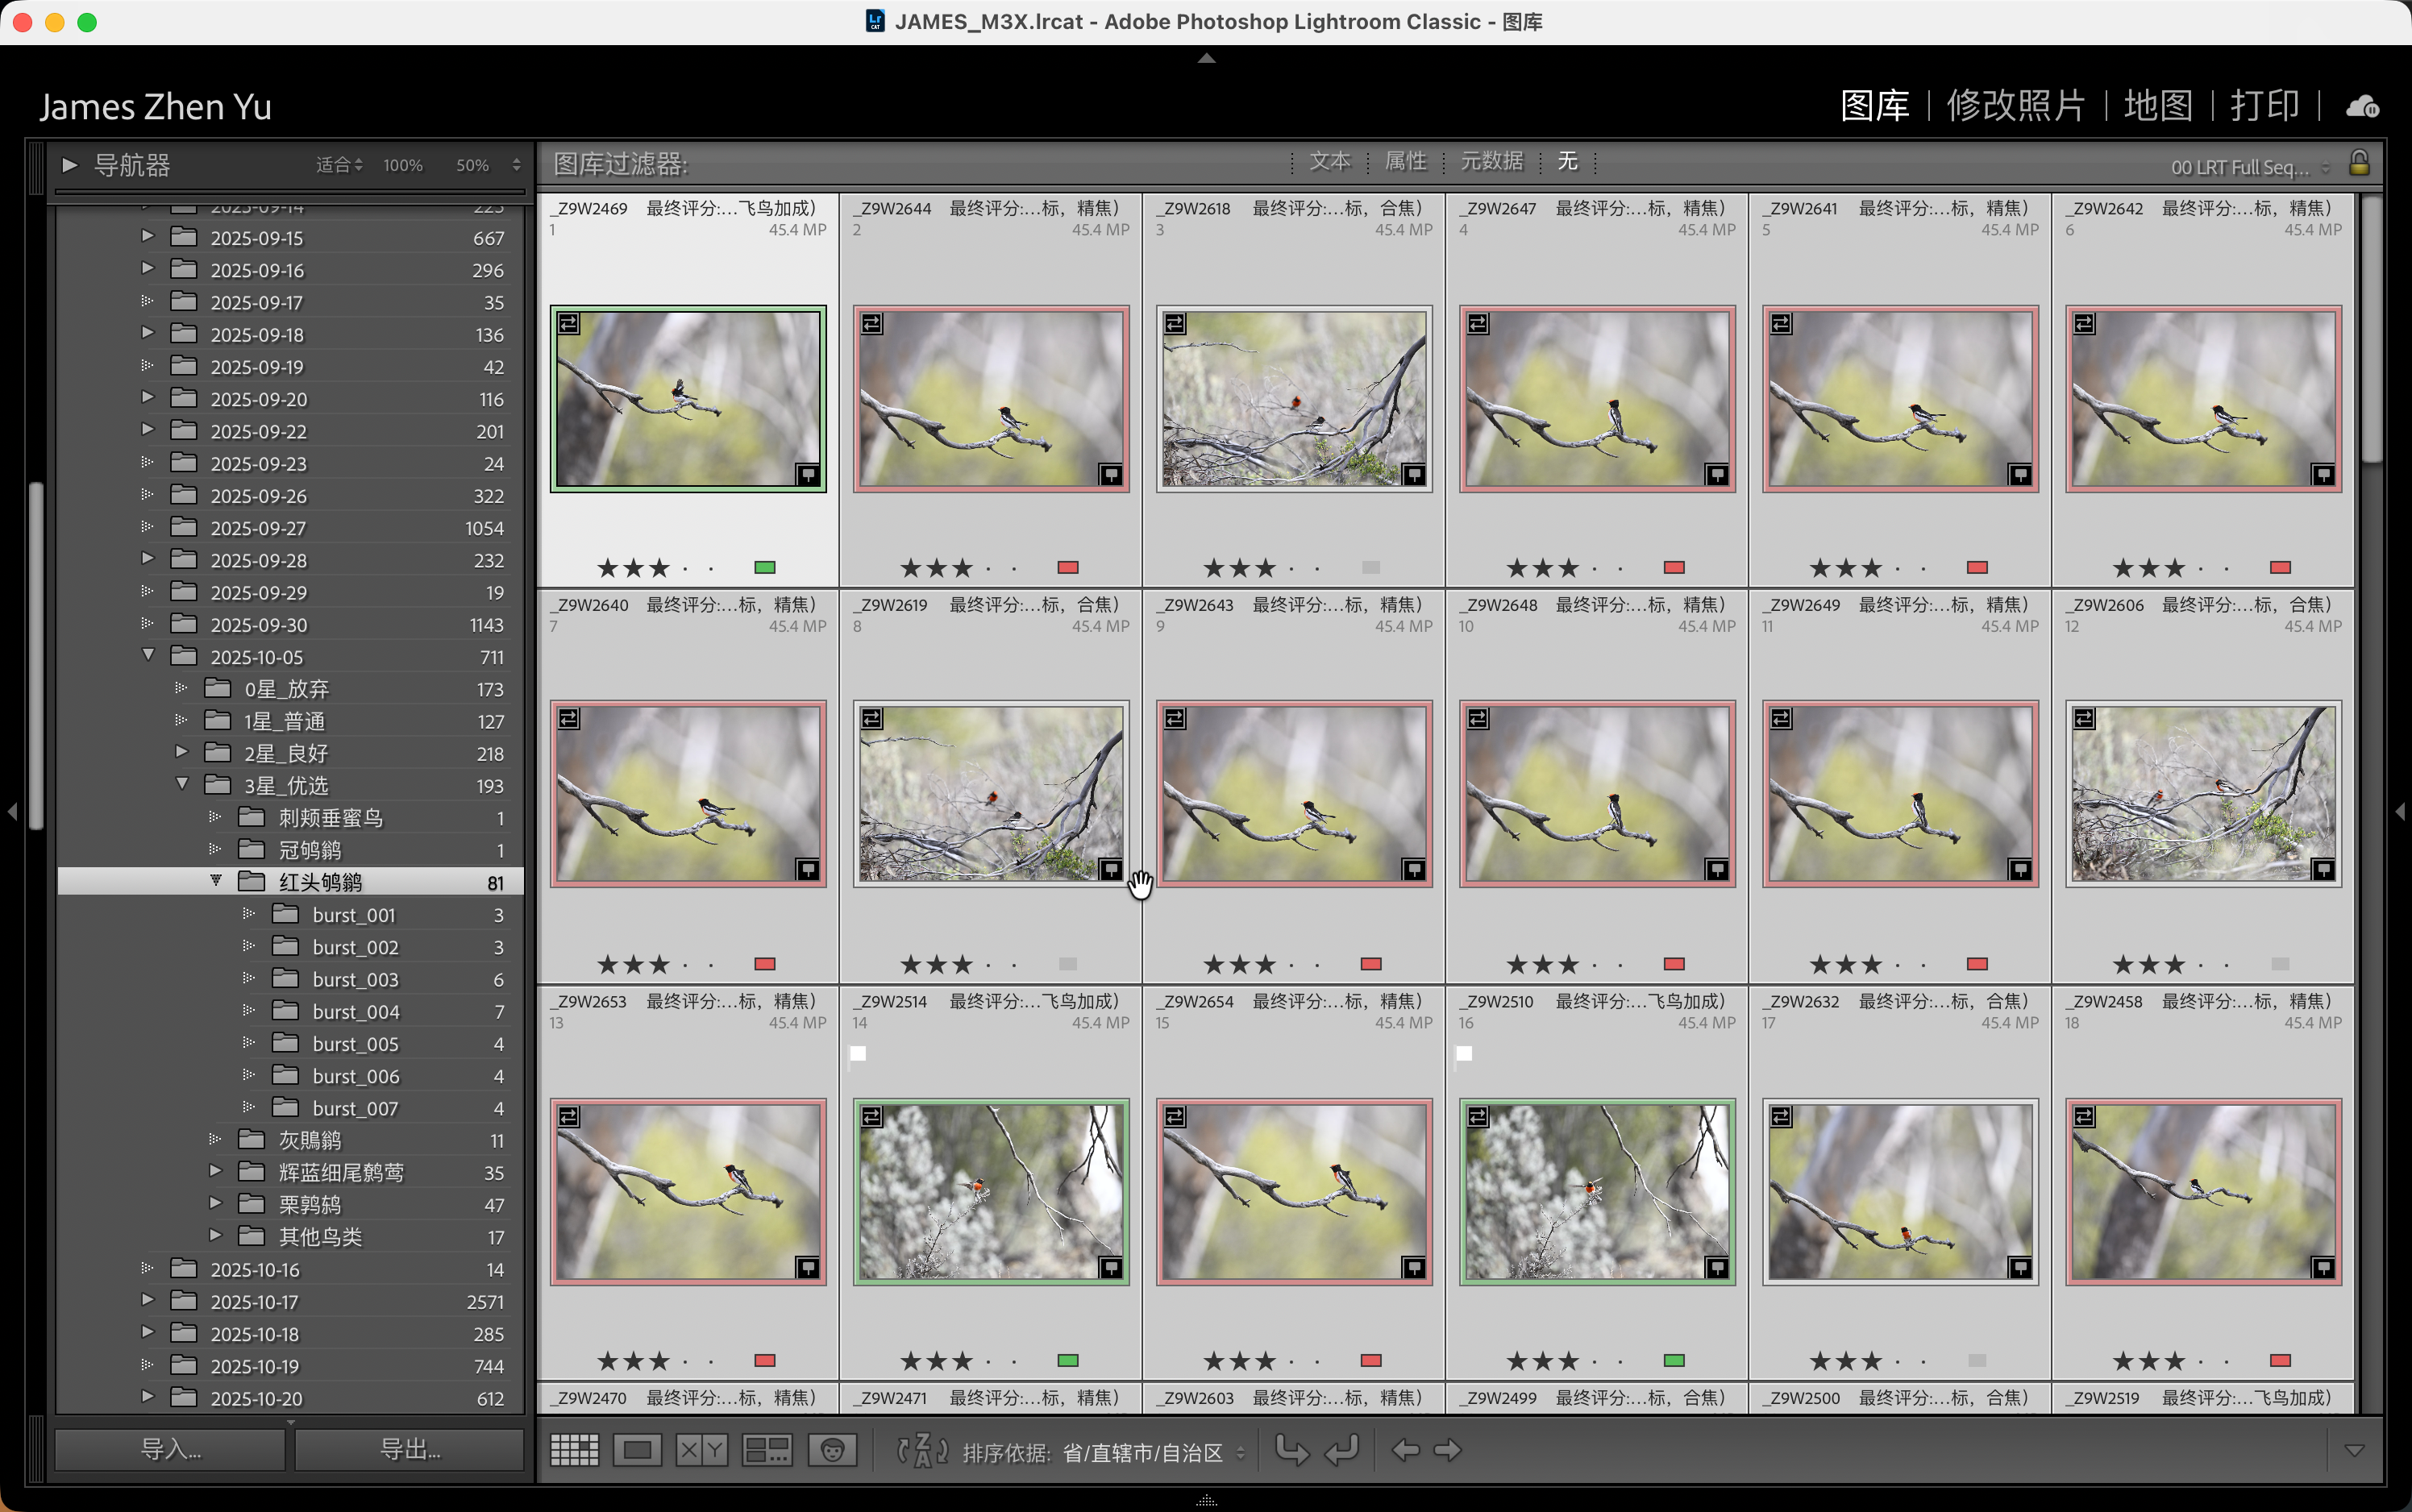
进入 burst_xxx
子目录,按「省/直辖市」排序即可快速看到这组连拍中美学评分最高的照片。注意观察照片上的旗标和颜色标签:
Enter burst_xxx subdirectory, sort by "State" to quickly
see the highest aesthetics photo in the burst. Note the flags and color labels:

解决中文版 Lightroom 颜色标签不显示的问题 Fix color labels not showing in localized Lightroom
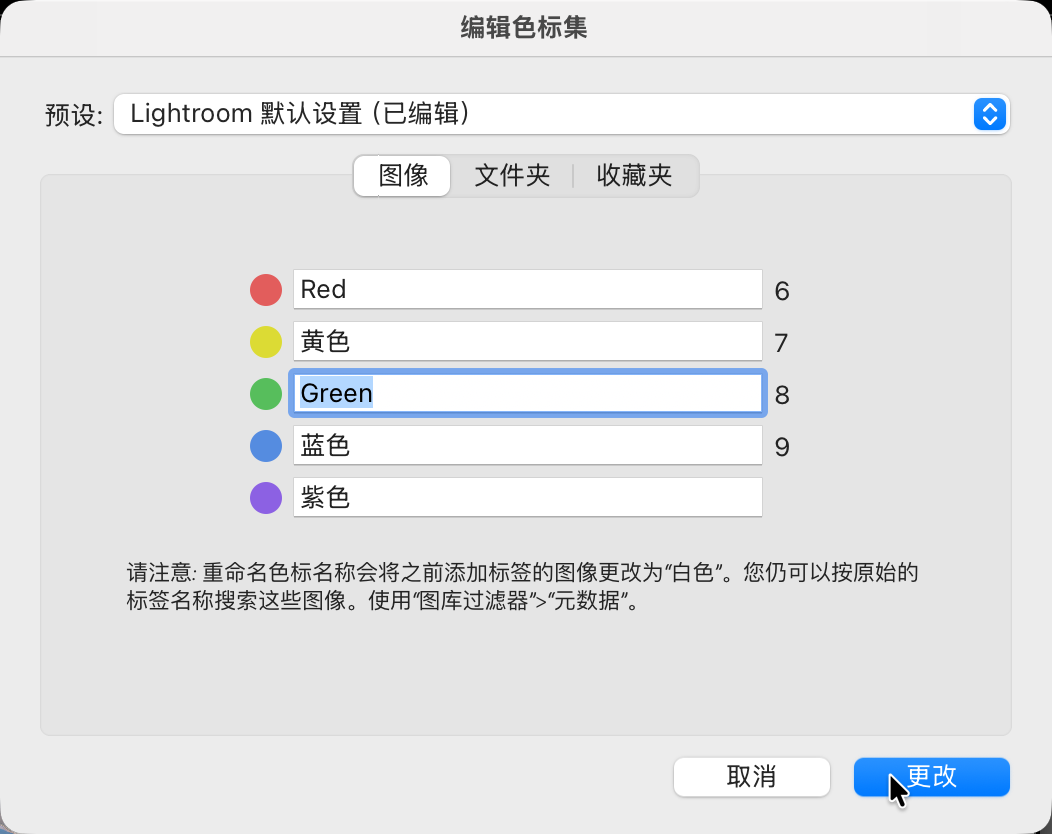
如果您使用中文版 Lightroom,可能看不到绿色和红色标签。这是因为 SuperPicky 使用英文名称("Green"、"Red"),而中文版默认使用中文名称。 If using localized Lightroom, you may not see green and red labels. This is because SuperPicky uses English names ("Green", "Red") while localized versions use translated names.
解决方法:选择菜单「元数据」→「颜色标签集」→「编辑...」,将绿色标签的名称改为
Green,红色改为 Red。
Solution: Go to "Metadata" → "Color Label Set" →
"Edit...", change green label name to Green and red to
Red.
如果想重新处理或恢复原始状态,按照以下步骤操作 If you want to reprocess or restore to original state, follow these steps
当您再次选择一个已处理过的目录时,SuperPicky 会自动检测到历史记录,并询问是否要重置。 When you select a previously processed directory, SuperPicky auto-detects history and asks if you want to reset.
选择「是」进入重置流程,选择「否」保留现有评分继续处理。 Choose "Yes" to reset, or "No" to keep existing ratings and continue.

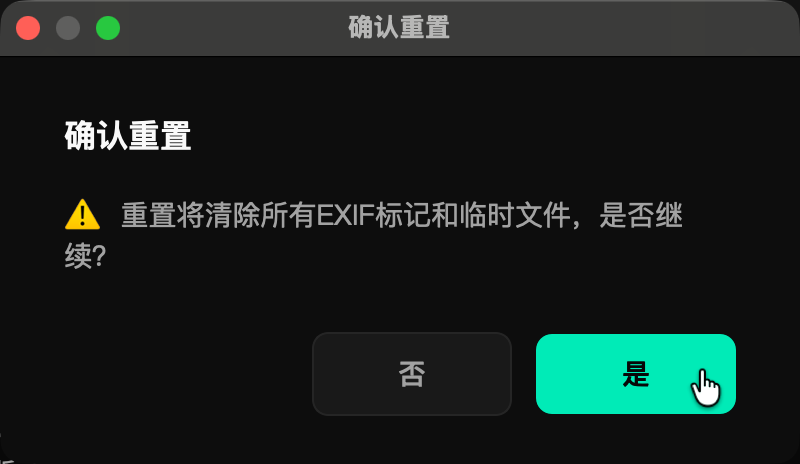
系统会再次确认。重置将清除所有 EXIF 标记(评分、旗标、标签)和临时文件,并将照片移回原始位置。 System asks for confirmation. Reset will clear all EXIF markers (ratings, flags, labels) and temp files, and move photos back to original location.
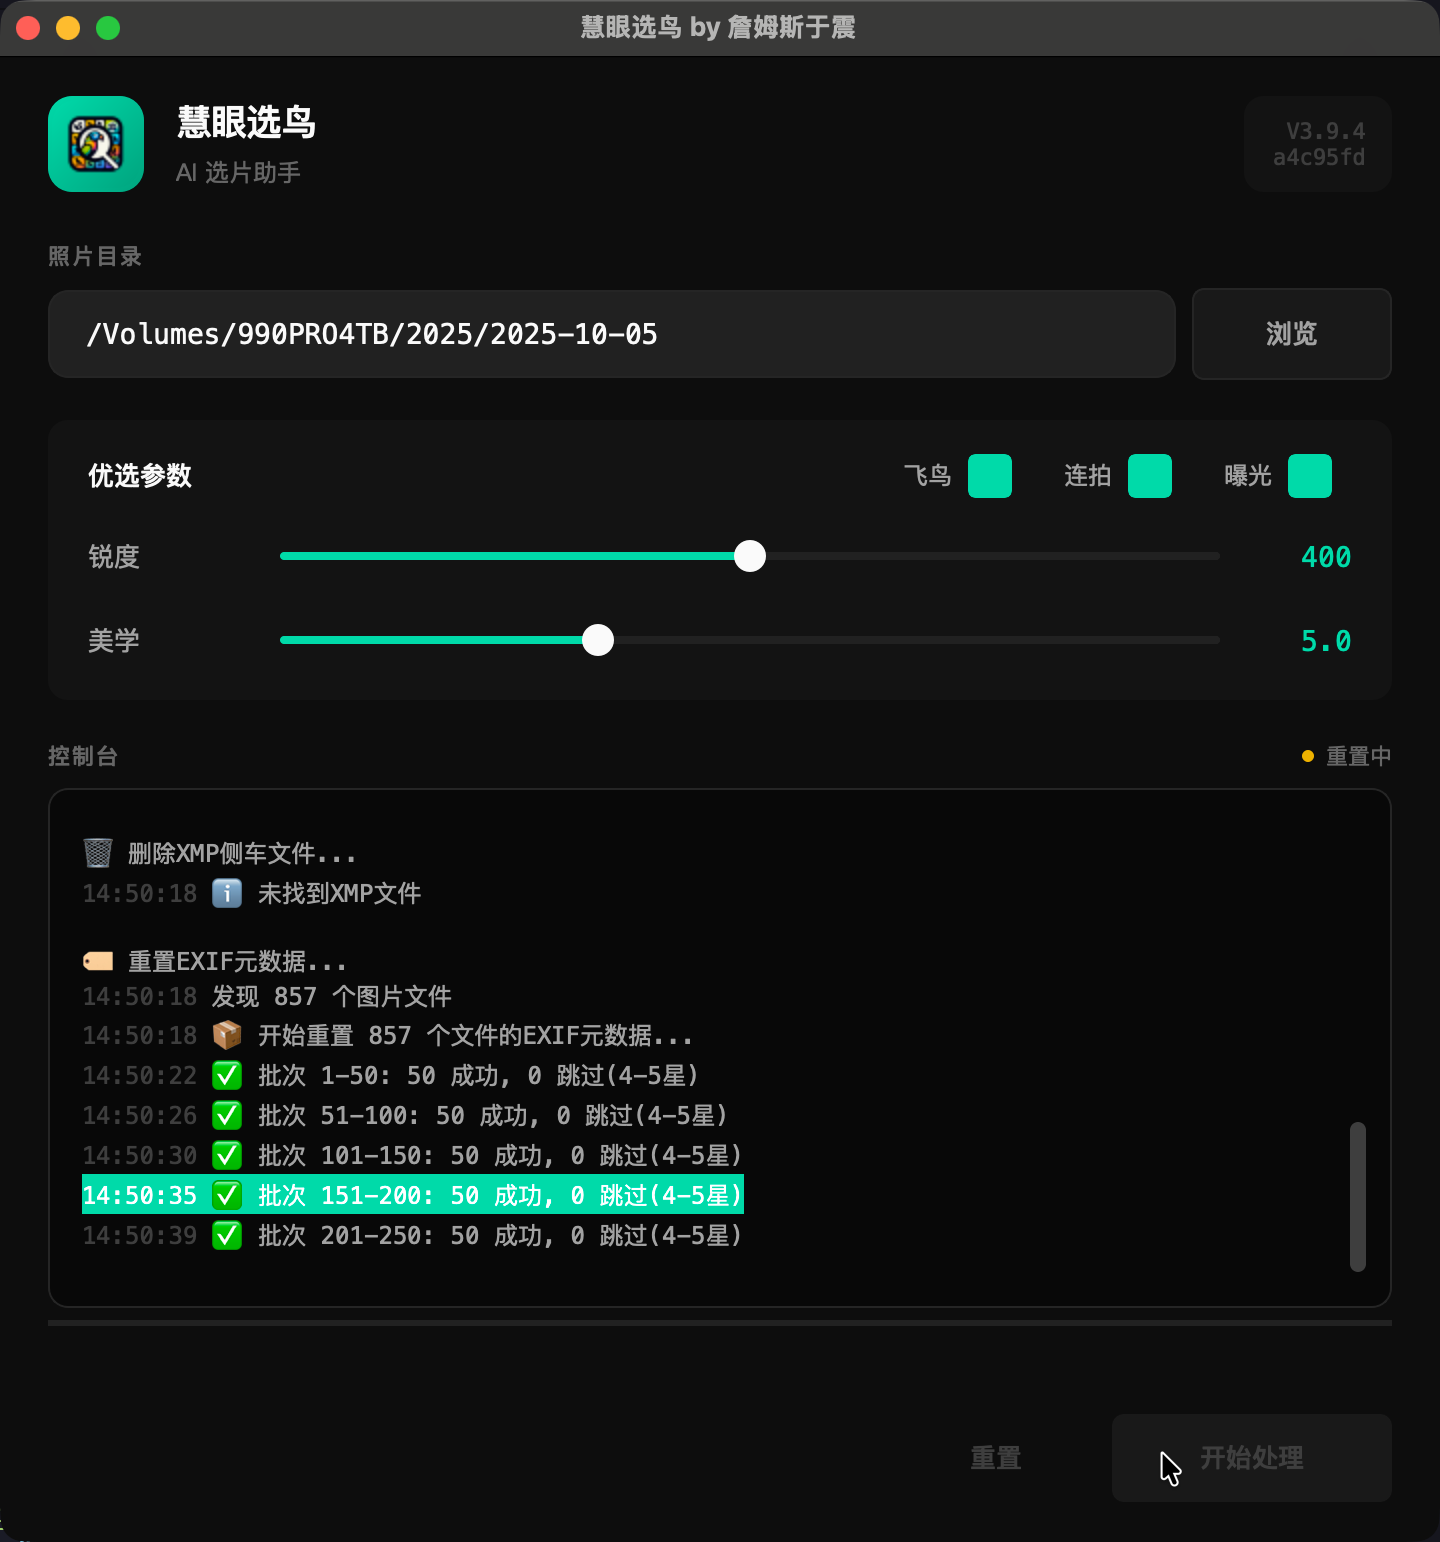
重置过程中控制台会显示进度。系统会删除 XMP 临时文件、重置 EXIF 元数据、恢复文件位置。 Console shows progress during reset. System deletes XMP temp files, resets EXIF metadata, and restores file locations.
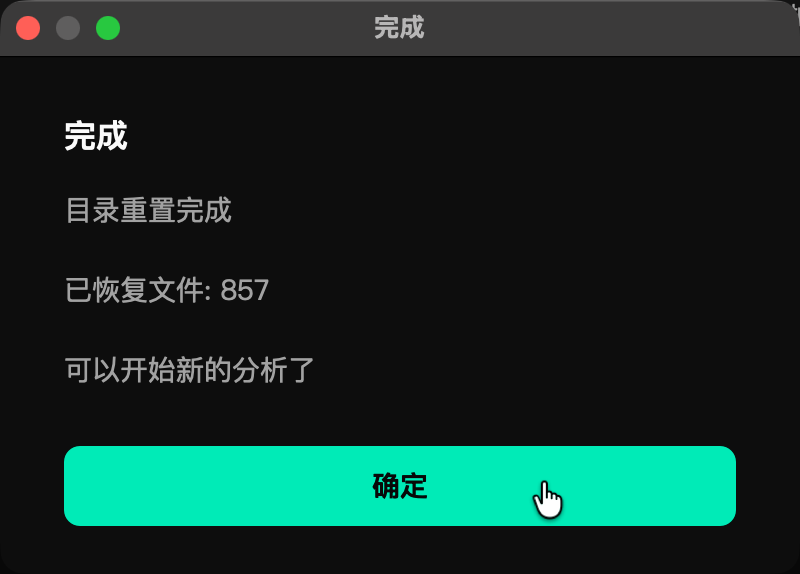
重置完成后会显示恢复了多少个文件。现在目录已恢复到原始状态,您可以调整参数后重新处理。 After reset, shows how many files were restored. Directory is now back to original state, and you can adjust parameters and reprocess.
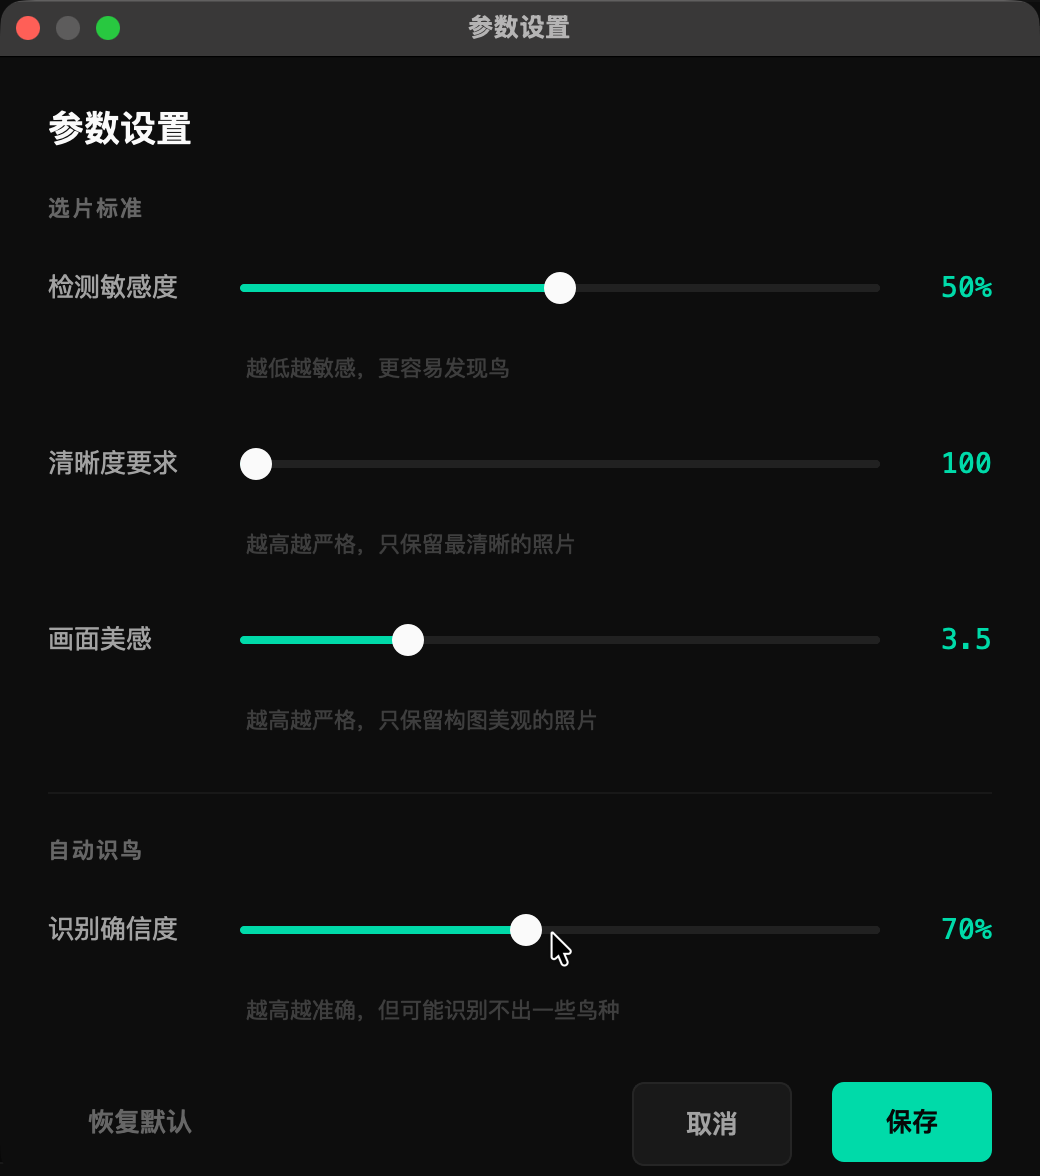
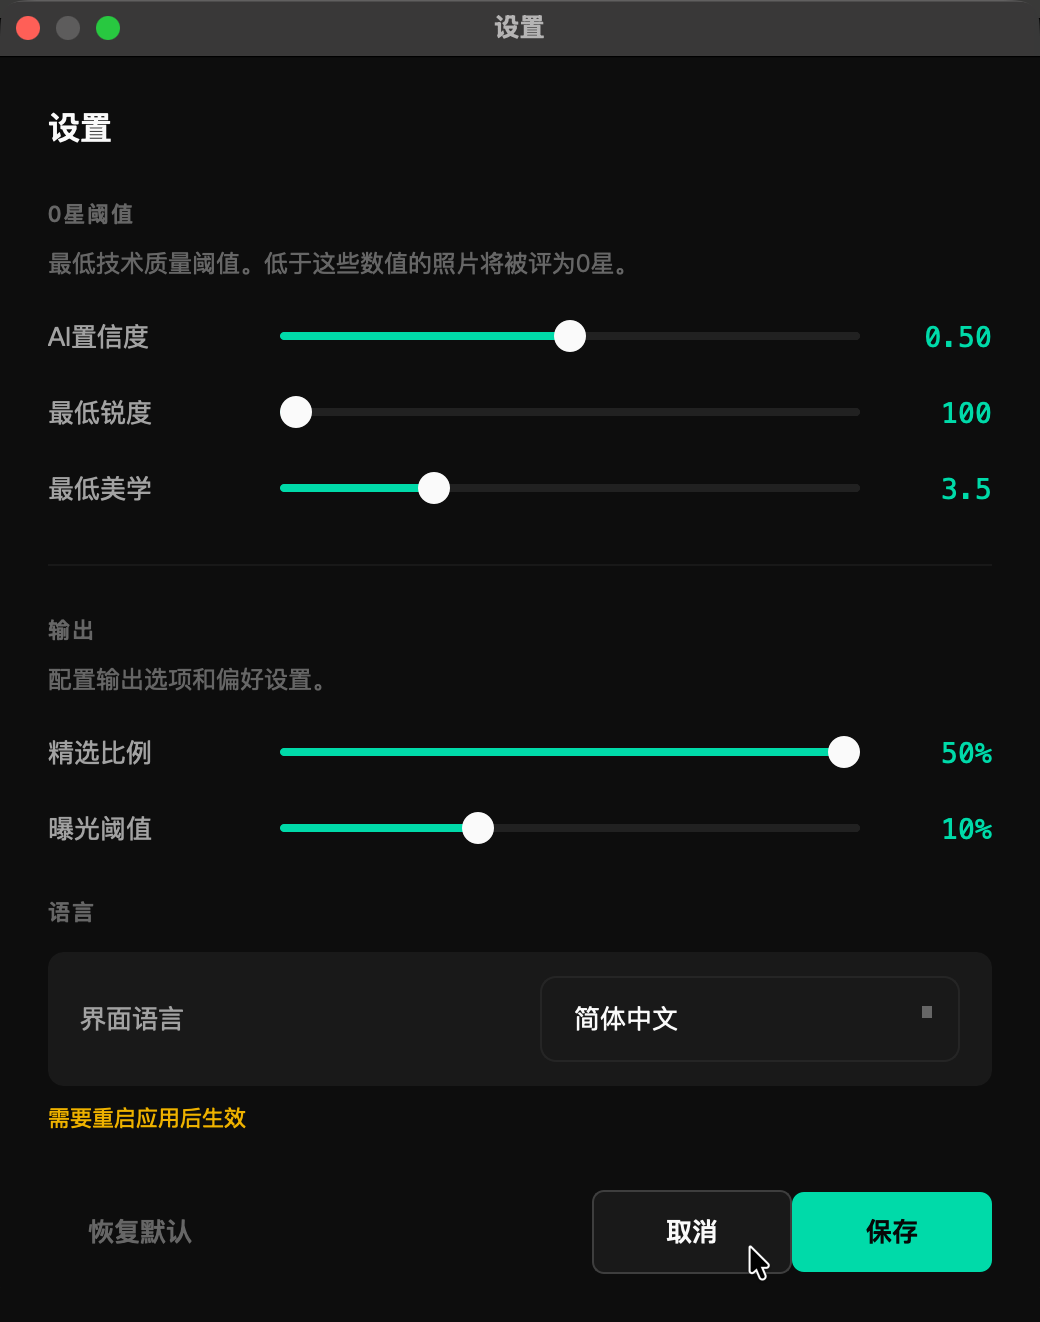
自定义 AI 评分阈值和其他高级选项 Customize AI rating thresholds and other advanced options
点击主界面右上角的设置按钮(齿轮图标)打开高级设置面板。这里可以调整: Click the settings button (gear icon) at the top right of the main interface. Here you can adjust:
如果您想深入了解选鸟算法,可以显示隐藏文件来查看 .superpicky 目录:
To learn more about the selection algorithm, show hidden files to view
the .superpicky directory:
.superpicky_manifest.json - 文件移动记录
.superpicky_manifest.json - File movement
records
.superpicky/debug_crops/ - 分析结果图片
.superpicky/debug_crops/ - Analysis result
images
V4.0.0 新功能:自动识别 11,000+ 鸟种并写入元数据 V4.0.0 Feature: Automatically identify 11,000+ bird species
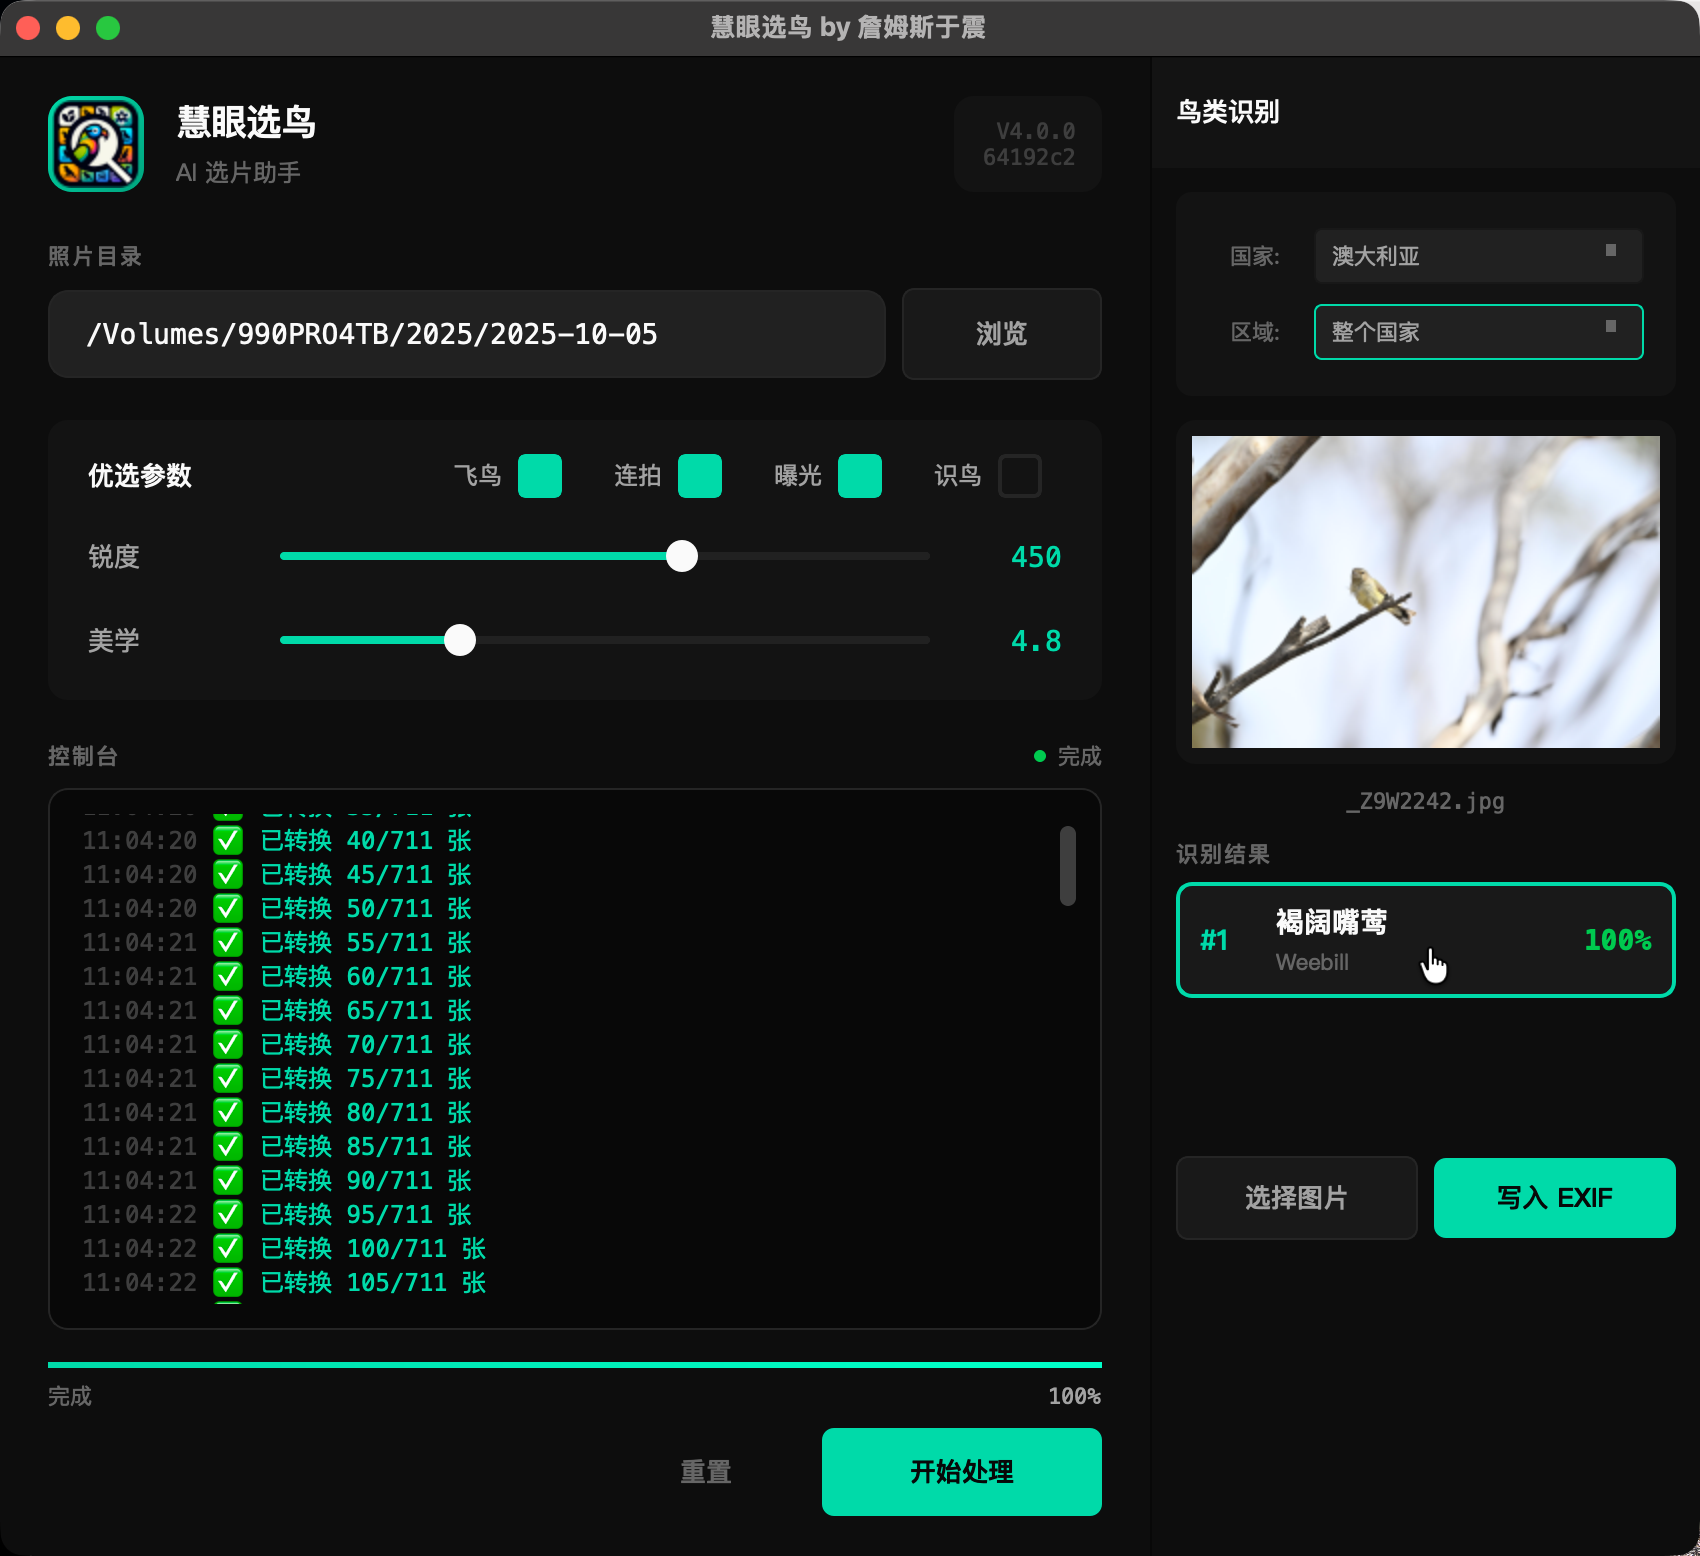
在主界面右侧找到「鸟种识别」面板,勾选「启用鸟种识别」复选框。识别结果将自动写入照片的 IPTC 关键字、标题和简介元数据。 Find the "Bird ID" panel on the right side. Check "Enable Bird Identification". Results will be written to IPTC keywords, title and caption metadata.
选择拍摄地点的国家和地区,AI 将根据 eBird 数据库过滤该地区不可能出现的鸟种,大幅提高识别准确率。 Select the country and region of your shooting location. AI will filter out impossible species based on eBird data, greatly improving accuracy.

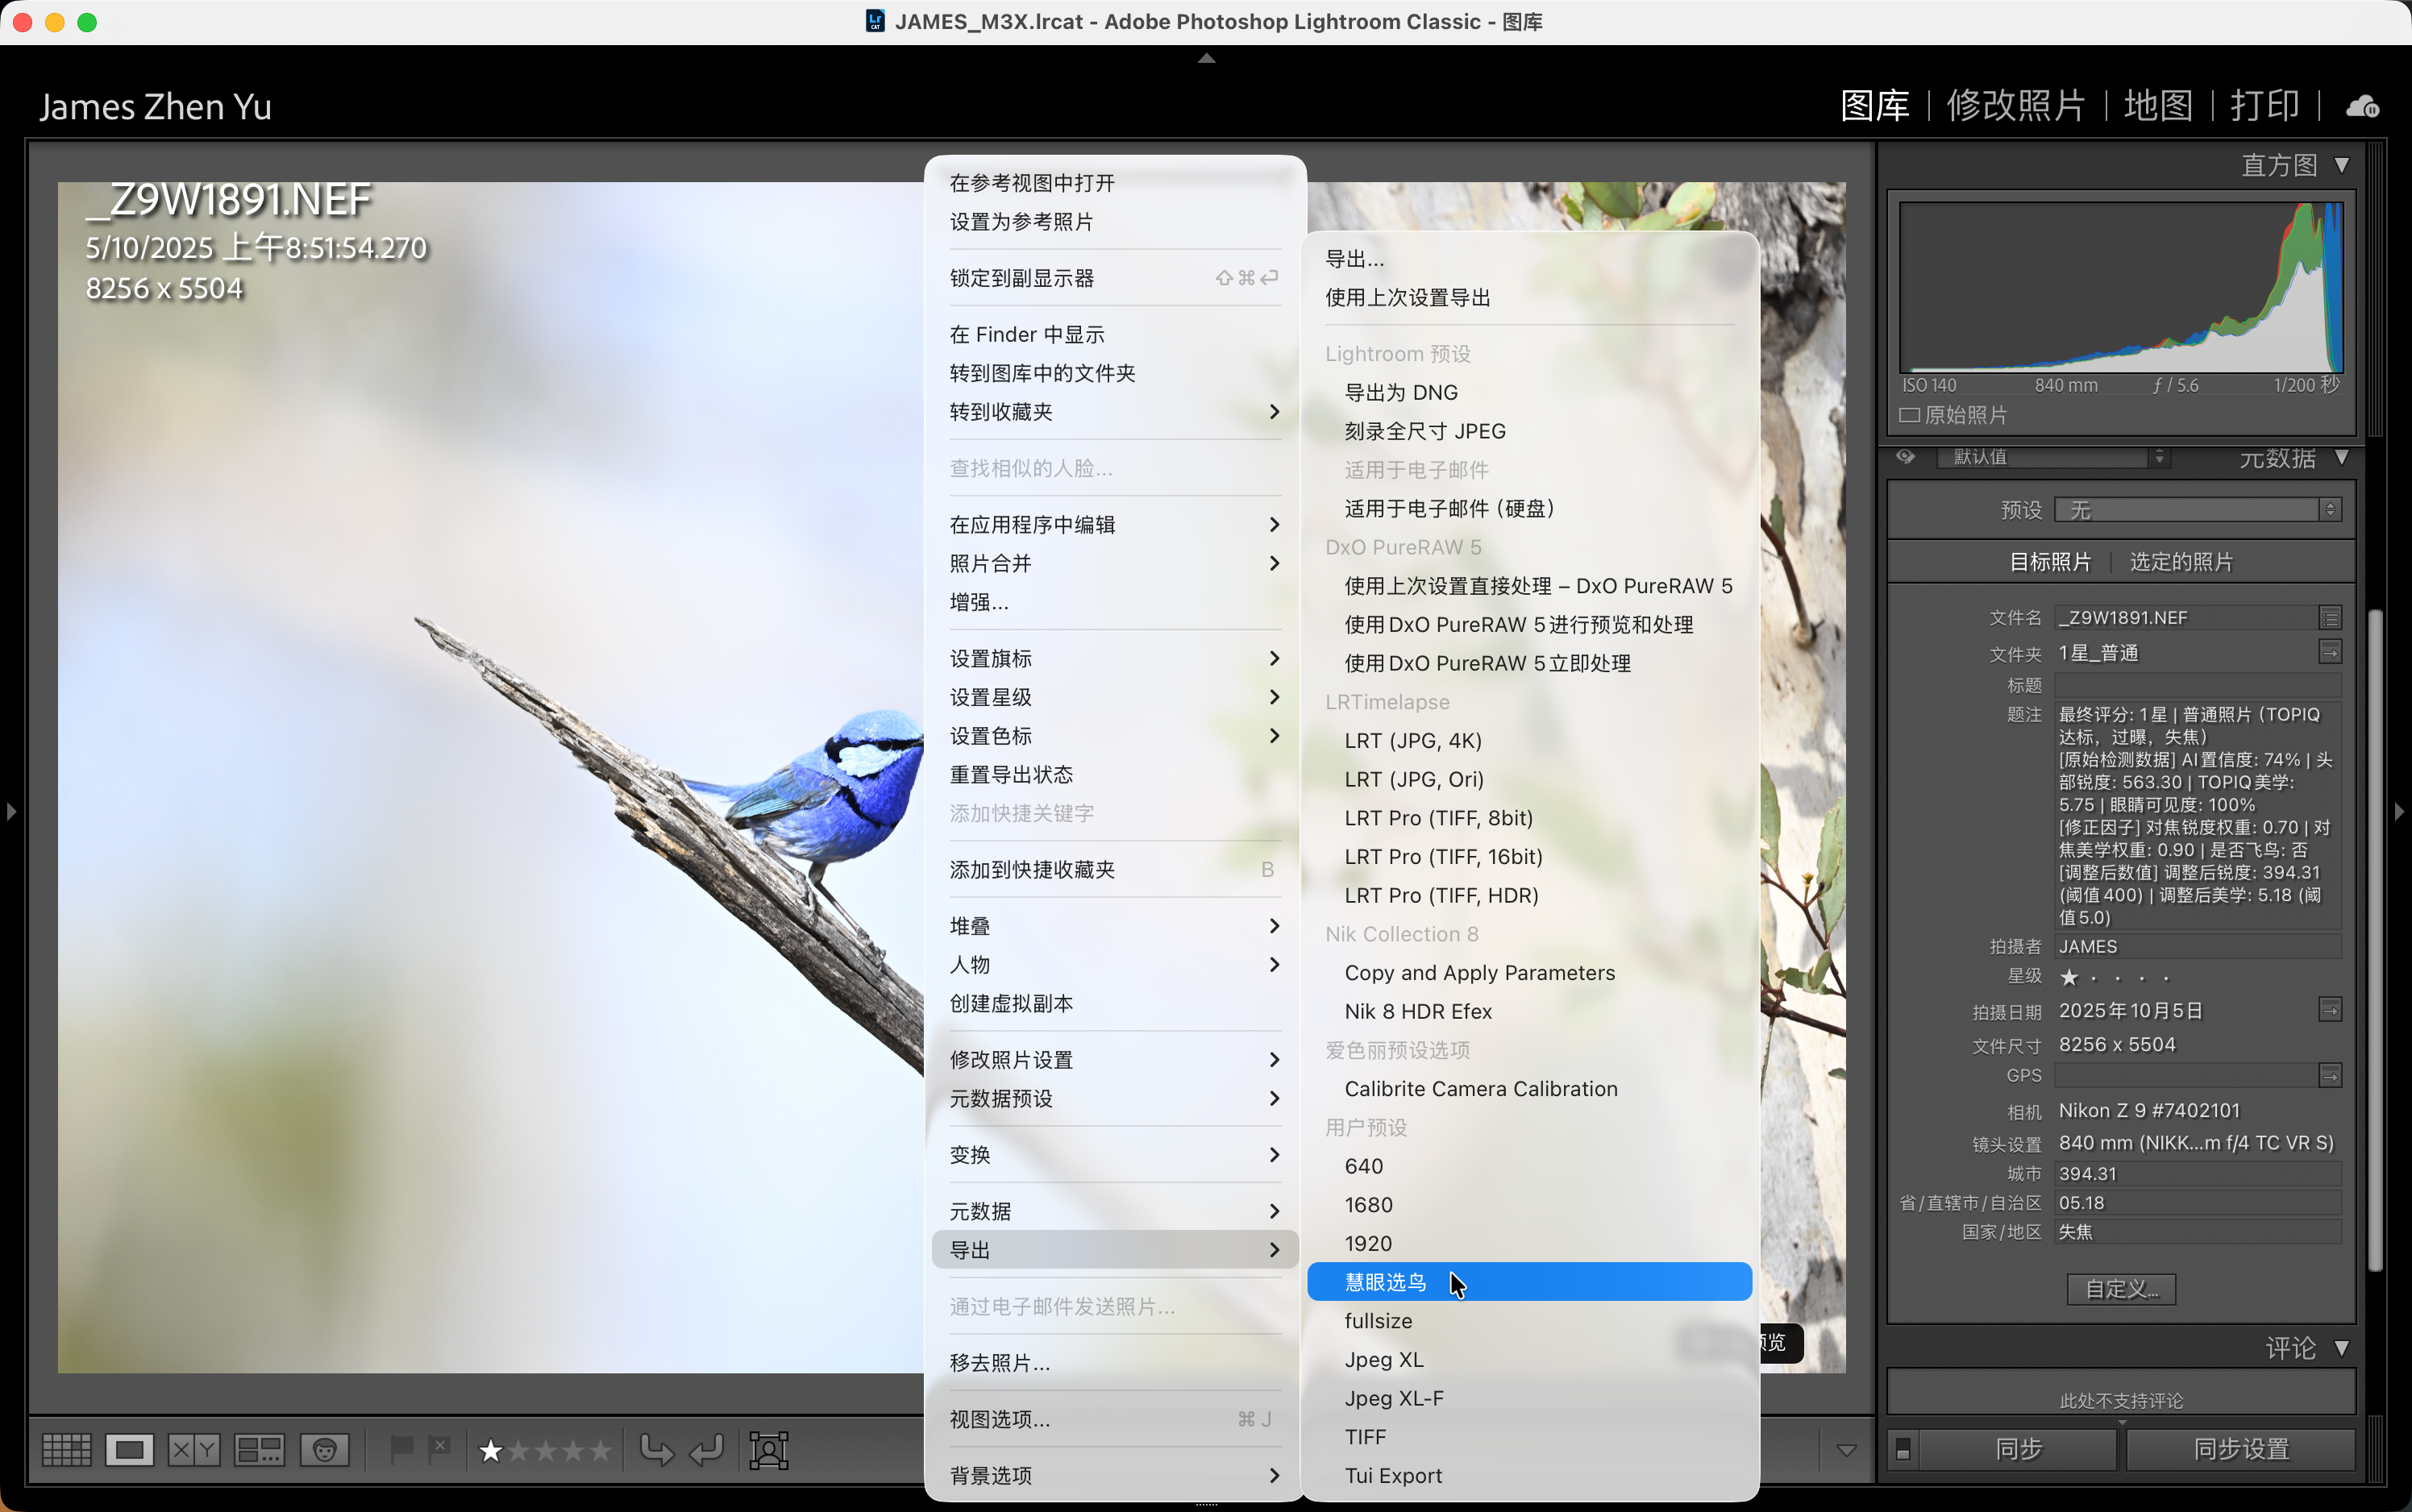
V4.0.0 安装器会自动部署 Lightroom Classic 插件,无需离开 Lightroom 即可识别鸟种: V4.0.0 installer auto-deploys Lightroom Classic plugin for seamless bird identification:
处理完成后,识别结果会写入以下元数据字段: After processing, results are written to these metadata fields:
启用鸟种识别后,可以选择按鸟种自动创建子目录整理照片: With Bird ID enabled, you can auto-organize photos into species subdirectories:
V4.0.0 新功能:支持后台运行,配合 Lightroom 插件使用 V4.0.0 Feature: Background mode for Lightroom plugin integration
V4.0.0 支持最小化到系统托盘(macOS 菜单栏),方便后台运行: V4.0.0 supports minimizing to system tray (macOS menu bar) for background mode:
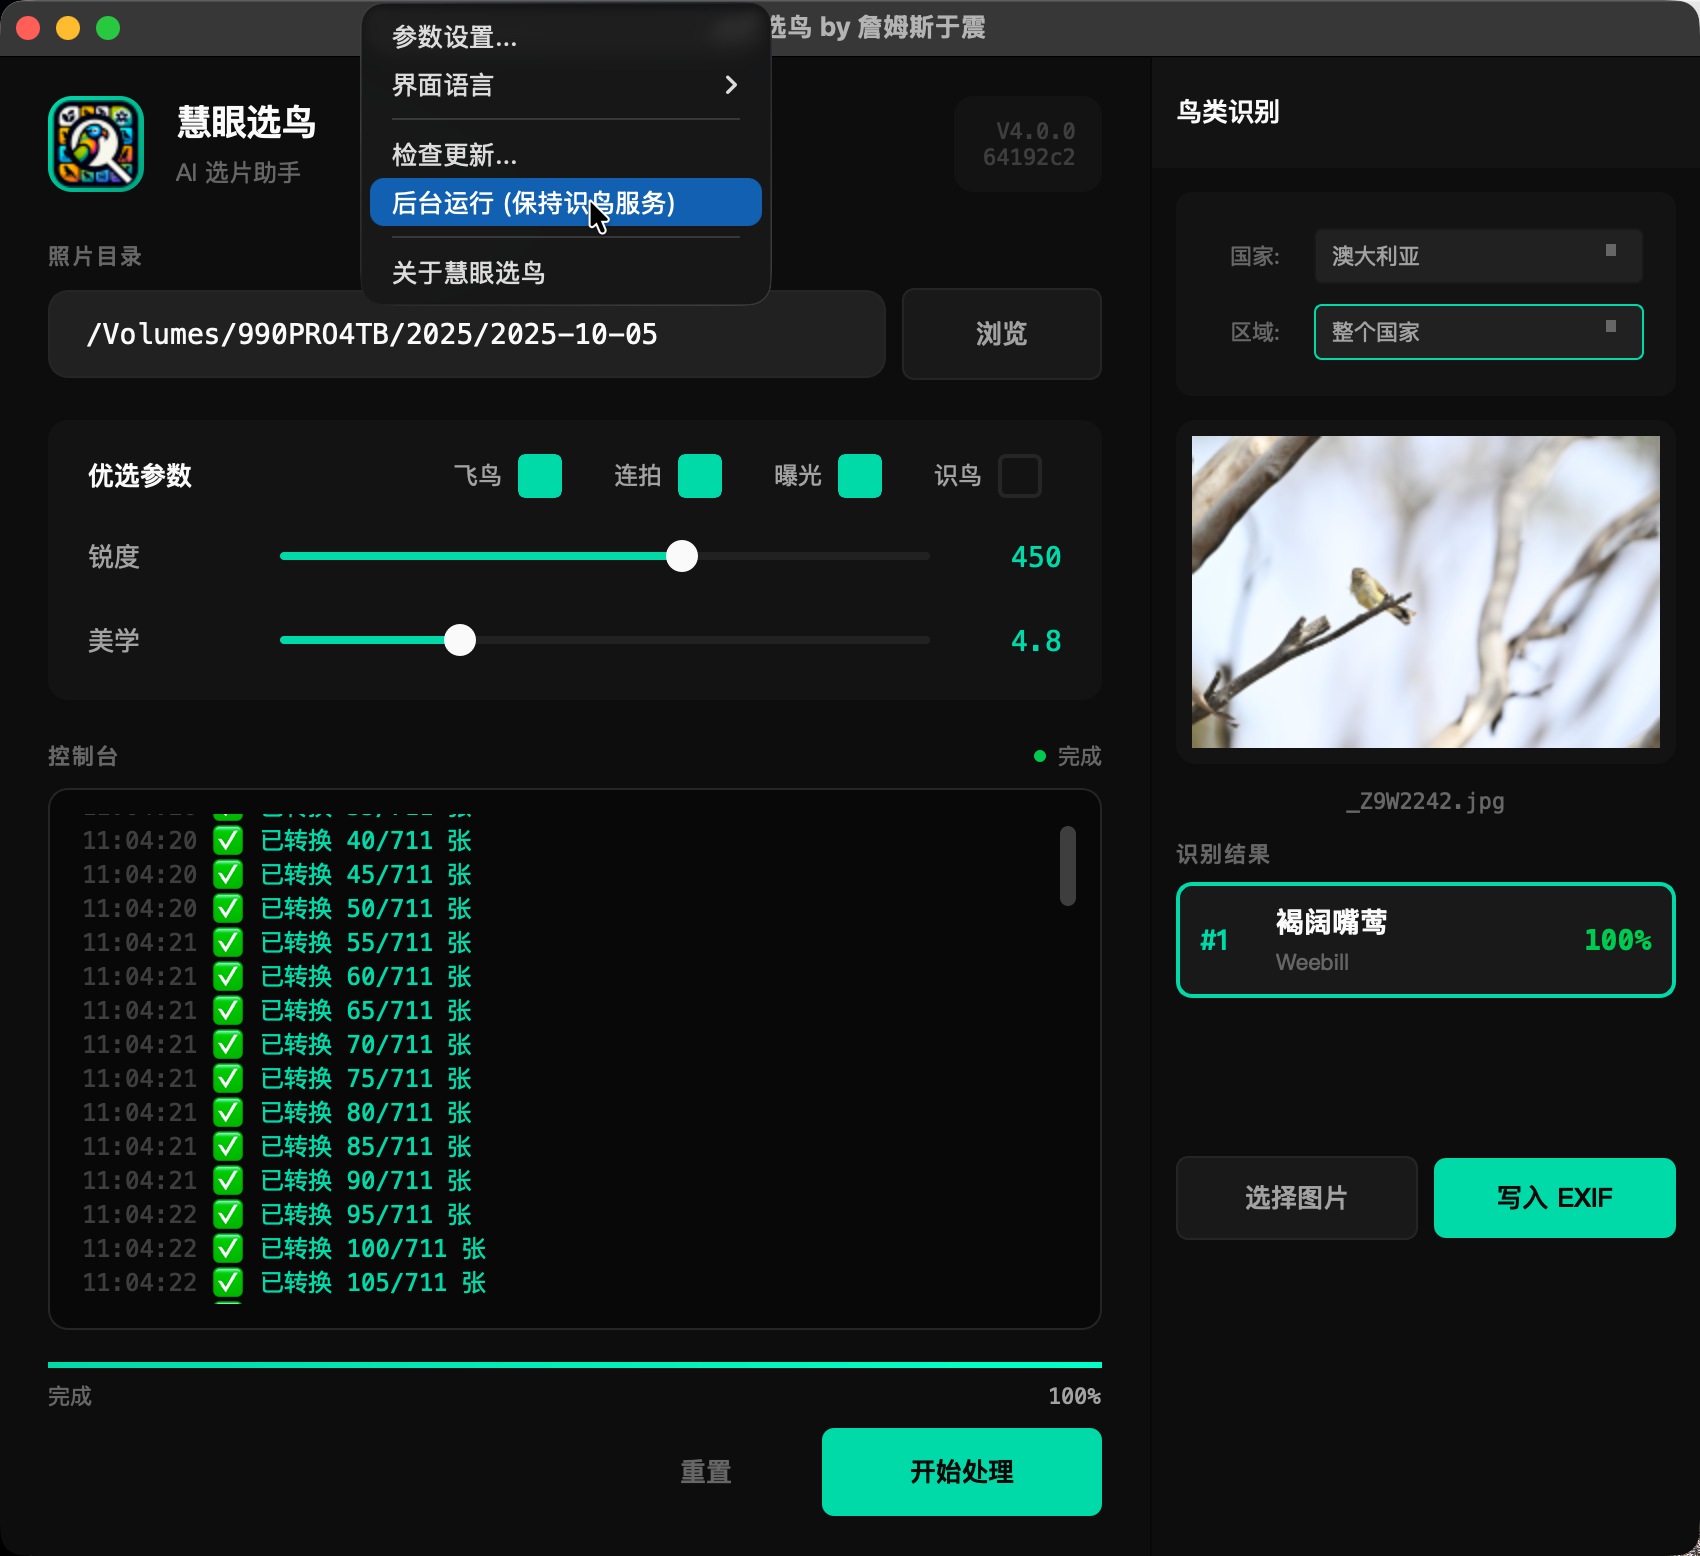
点击菜单栏图标可以执行以下操作: Click menu bar icon for these operations:
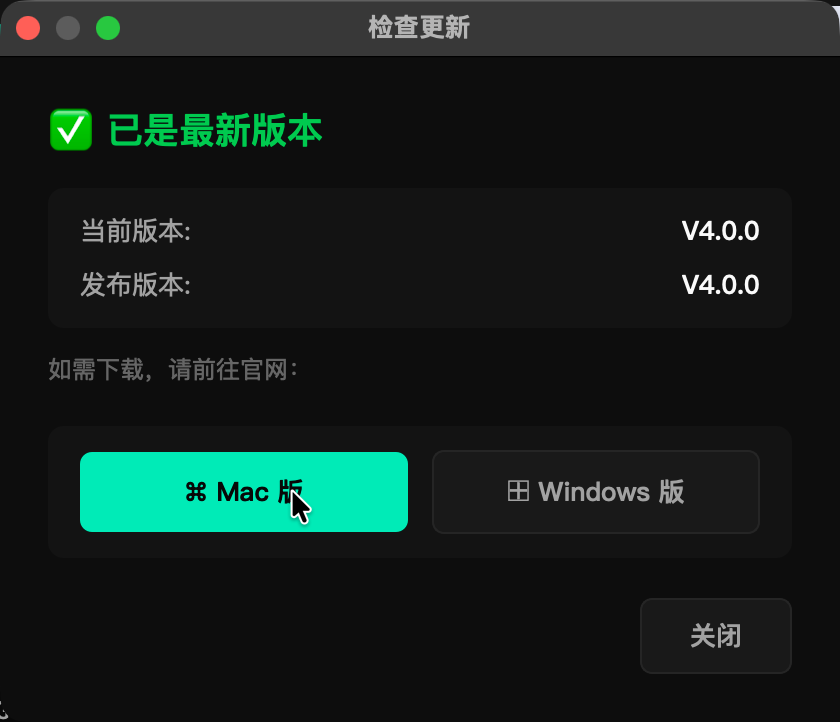
V4.0.0 新增自动更新检测功能: V4.0.0 adds automatic update checking:
现在您已经掌握了慧眼选鸟 V4.0 的所有核心功能,包括 AI 选片、鸟种识别、Lightroom 插件和命令行工具。如果还有问题,请查看常见问题解答或联系我们。 You've now mastered all core features of SuperPicky V4.0, including AI selection, bird identification, Lightroom plugin and CLI tool. If you have questions, check our FAQ or contact us.